


By Susan Lyttek
This easy ten-step project is fun to make as a family and remarkably inexpensive. The recipe makes enough “cookies” for several wreaths. Last year at a craft event, people from age 7 to 79 made the wreath at my table … all with amazing results. You can easily make enough to give to all your neighbors at about a dollar a wreath.
You will need:
- Heavy cardboard. I picked mine up for free at a local warehouse club. Produce containers work best.
- Craft wire
- White glue
- Christmas paper. Whatever you have on hand. The cheaper paper stuff works better. High gloss or metallic makes it hard for the cookies to stick
- Plain flour: the cheapest you can get
- Table salt
- Water
- Fingerpaints for coloring the dough. This is the most expensive item. I found the four color set works well. When you run out of the green paint, you can mix blue and yellow. It also has plenty of red for the berries.
- Ornament or greeting. Whatever you can find and like at your local dollar store. The ones used in the pictures came in sets of three.
- Permanent markers (for leaf veins or berry accents).
First: Make the salt dough.
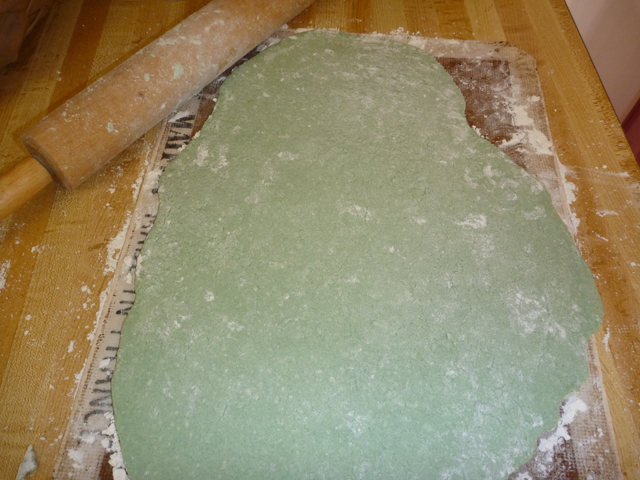
Mix together 3 cups of flour with 1 cup of salt in a large bowl. Add to it 1 cup of water. Mix well and knead until smooth. Remove a quarter of the dough and set aside. To the remaining dough, add green fingerpaint until it is a light green color. (The dough will darken as it dries.) If the green doesn’t seem rich enough, you can always add a little blue. Then, using plenty of flour to keep it from sticking, roll it out until about a 1/4-inch thick. The result should look like the first picture. Do not worry about using too much flour. What doesn’t shake off when dry will look like snow.
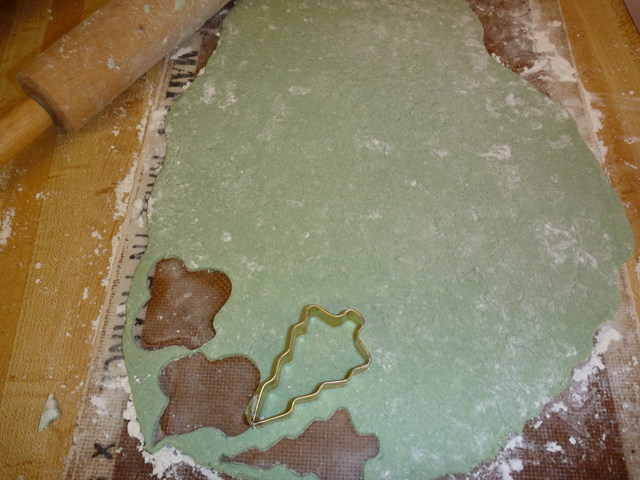
Second: Using your favorite leaf-like cookie cutters, cut the dough. It looks most natural if you have two to three types of leaves for your project.
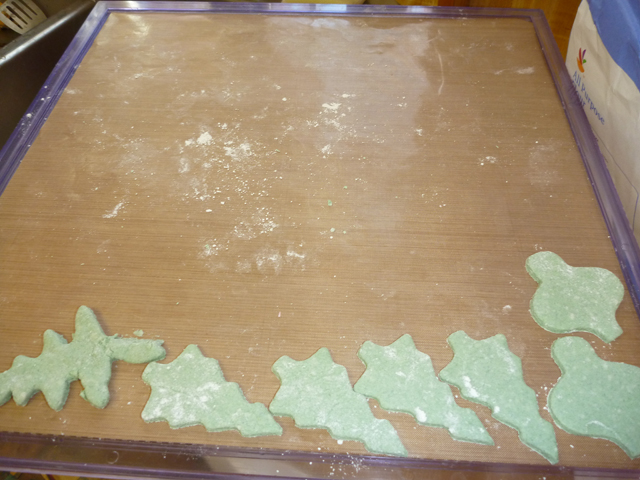
Third: Dry the leaves. I used a dehydrator on the fruit setting overnight and it worked perfectly. You can also dry these in your oven by baking them on parchment paper at 200 degrees F. for 10 to 12 hours.
Fourth: Take the remaining dough and add the red fingerpaint to it until it is pink. Roll as you did the leaf dough and cut into small rounds. I used a water bottle lid. Add to the dehydrator sheets or parchment paper about an hour after you begin the leaves.
Fifth: While the cookies are drying, cut your wreath forms.  Caution: Only an adult should do the actual cutting as you need a very sharp knife or safety blade to cut the cardboard. Draw two circles, one inside of another on the cardboard. I used the cardboard backing for frozen pizza for the outside and one of my saucepans for the inside. The key is to have a diameter of 11 to 12 inches on the outside circle, and 4 to 4 1/2 inches on the center circle. This will allow a natural wreath appearance and enough room to decorate. Once you have (or your assistant has) traced the circles, score both circles with your blade. Then, using a gentle sawing motion, cut out the smaller circle first. This will give you a natural handhold and I found it easier than cutting the big circle first. Repeat with the large circle to create your form.
Sixth: Cut craft wire using heavy duty scissors or wire snips into 15-inch pieces. Wrap one wire around the designated top of your wreath. The fold should go about an inch above the top. Twist it three times as close to the wreath as possible to form the hanger. On the inside circle of your wreath, twist the loose ends of your wire three times, too, leaving enough hanging wire for your ornament.
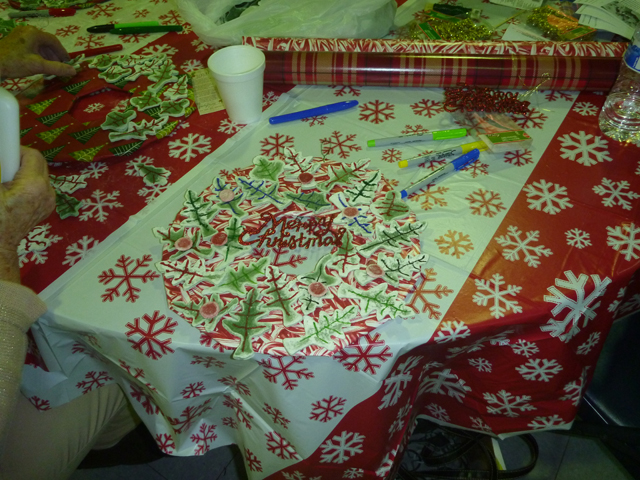
Seventh: After leaves and berries are dry, have fun with the assembly process. Cut a piece of wrapping paper big enough to hide the entire wreath. Set your square of paper over the wreath and gently poke a hole approximately in the center of the small circle. Cut two sides of a triangle into the paper in several places, making sure not to cut past where the paper will cover the cardboard. Gently pull these triangles through the center and around the wire, taping or gluing to the back side. Now wrap the outside of the wreath, accommodating the wire, and taping or gluing the paper to the back.
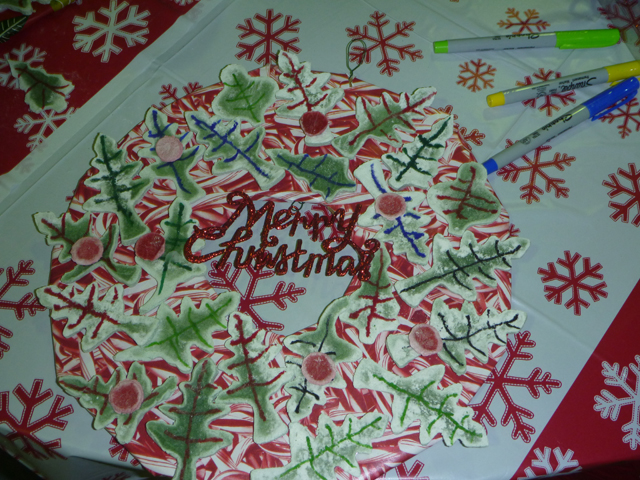
Eighth: Using glue, fasten your leaves and berries to the wreath in any way you like. It takes a little while for the glue to dry, so you can rearrange things until you are satisfied.
Ninth: Add veins to leaves and highlights to berries with permanent marker if desired. Some people did this step before step eight.
Tenth: Hook your ornament to the wire in the center. Use the body of the ornament to camouflage any remaining wire or clip it off. Then use the wreath to decorate your house or grace the front door of a neighbor.
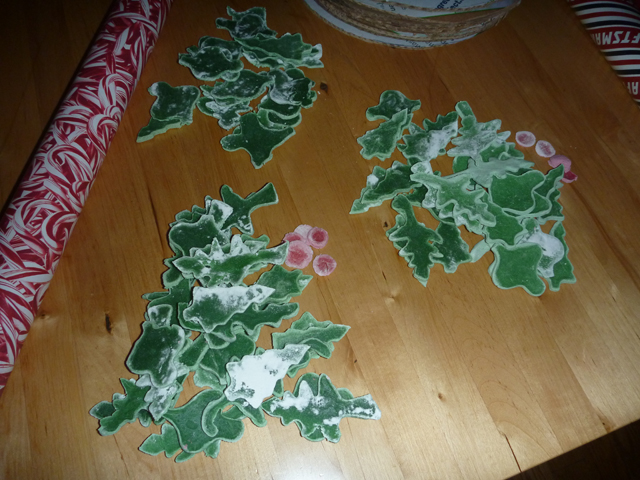
Here are three of the finished wreaths from the crafting day!

Susan A. J. Lyttek, author of the kids’ comedy Guzzy Goofball and the Homeschool Play from Outer Space (Lighthouse Publishing of the Carolinas) and the Talbott family mystery trilogy by Harbourlight Books, writes early mornings in the shadow of our nation’s capital. Find out more about her and her projects at www.sajlyttek.com.