


By Jenn Dana
This time of the year makes my head spin! Spring is so full of activity when it comes to gardening. Just this weekend, we transferred our tomatoes to our outdoor garden area. In celebration, I thought I would teach you to how to start tomato plants indoors before transferring them outside. This step-by-step how-to guide includes pictures and gardening tips for a successful tomato harvest.
How to Start Tomato Seeds Inside
First thing’s first. Find out what planting zone you are in so that you know when to start your seeds and when you should transfer seedlings to your outdoor garden.
We (Kentucky) started our seeds inside on March 9 and transferred our seedlings to our garden on April 11. You want to make sure you transfer seeds to outside garden after there is no chance of a frost killing your seedlings. Of course, we know that things happen and we cannot always control the weather.
Purchase the kind of seed you want to use.
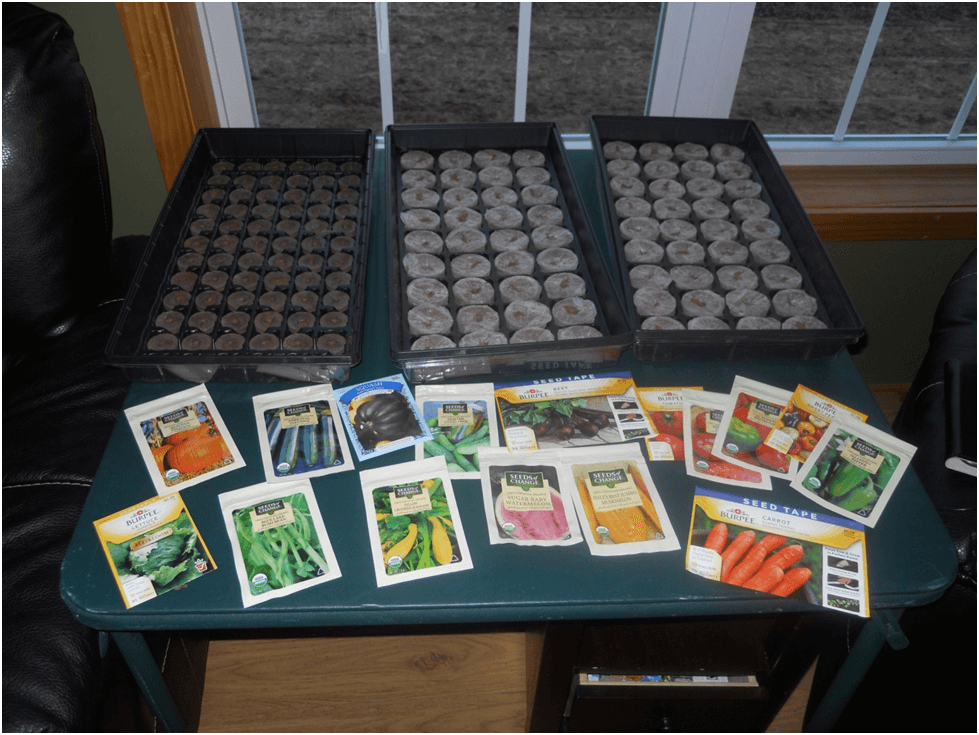
There are many different kinds of tomato seeds to choose from. There are organic, non-GMO, heirloom, or just plain nonspecific seed types. You can choose from many different varieties also. They have cherry tomatoes, Roma tomatoes, beefsteak tomatoes, Early Girls, Better Boys, etc. I recommend researching the different kinds and make a choice based on your needs. Some tomatoes are good for eating fresh while others are good for making sauces and tomato paste.
Buy Soil and Prepare Seed Beds
We purchased seed trays that had compacted soil in them so we just had to add water. Then we planted our seeds according to the directions on the package for the soil depth the seed should be planted. If you are using just plain containers and starter soil, make sure your soil is good and wet.
After you have sown seeds, cover trays with a plastic cover or plastic wrap.
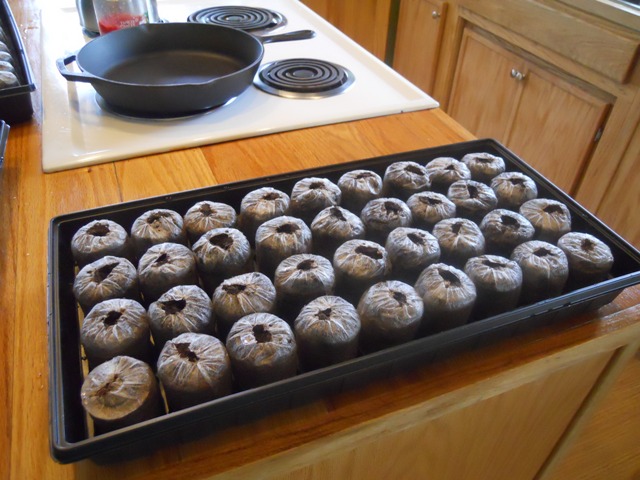
This is important to do because it gives a greenhouse effect to the growing process by trapping moisture inside the container.
Once seeds have sprouted, remove the plastic cover and make sure seedlings have adequate sunlight and water while they grow.
The process of the seeds sprouting can take anywhere from 3-7 days.
Harden Seedlings to be Transplanted
Once your seedlings reach the point that you think they can be transplanted outside, you need to start hardening them to the outside climate. We do this by setting them outside in the sunlight for 4-5 days prior to transplant and bringing them in at night.
Plant Outside
After hardening the plants, they are ready to be planted outside.
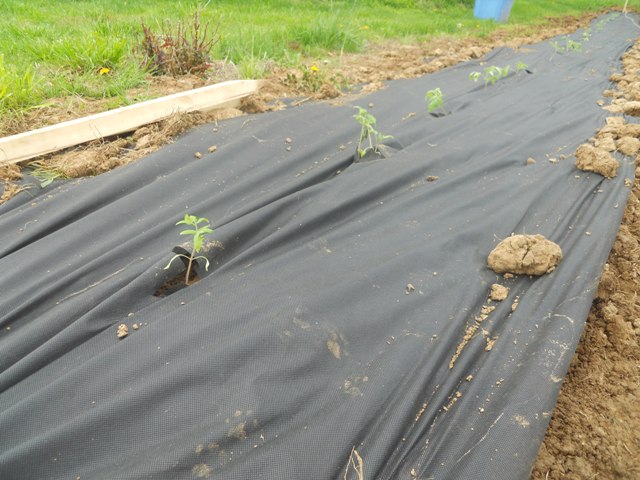
We have quite a large garden area where we transfer our plants. We make our rows by pounding large stakes in the ground on each end of the row and running bailer twine between the stakes. This makes a straight row for you to follow while planting.
This year we are using weed mat for the first time. We pounded the ends of the weed mat down under the stakes at each end of a row to hold it in place. After that, we piled dirt on the edges to keep it flat. Then we cut horizontal 4-inch slits and vertical 4-inch slits crossing each other every 2 feet. We also used a long measuring tape to guide us and give us the 2-foot markers. Then we pull back the mat and planted our seedlings in the openings.
They have been outside for two full days now and are doing well.
This is the method that we use for starting our tomato plants and moving them to our outdoor garden. Gardening is such an enjoyable and rewarding experience. I hope you all have an opportunity to grow and harvest your own tomatoes this spring!
Jenn Dana lives in Kentucky with her husband of fourteen years and 9-year-old son. She spends her time homeschooling, baking, and managing their household. You can follow her at www.littlehouseonthe100.com.