


By Kenzi Knapp
You know yogurt is a powerful, healthy food for your family, but can you really make it from home? Absolutely! With a little practice, homemade yogurt can find a place of honor on your table. Here I’ll share a simple process for how to make yogurt at home–from our family to yours.
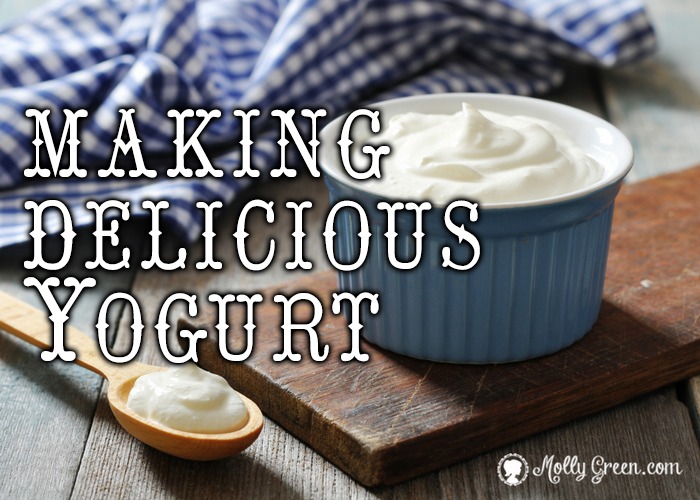
Tips on Making Yogurt
Our family enjoys homemade dairy products, but it’s essential that raw milk be handled in a sanitary manner to minimize the growth of harmful bacteria. Be clean while milking or be sure your milk source practices good sanitary procedures. (Note: I’ve only made yogurt from cow milk, but much of the following should hold true with goat milk as well.)
Now that you have your milk, should you skim or not skim the cream? As a hearty, fat-loving American (just being honest here), I personally like the richer, thicker flavor cream adds to yogurt. But the choice is entirely yours. The main differences I’ve noticed are skimmed milk is slightly more watery, has a more bland flavor, and is not quite as firm.
Remember, the older the milk is the shorter the shelf life of the yogurt will be. Fresh cow milk from a clean, sanitary dairy will keep for about ten days (expect about a week for goat milk).
Some people really don’t like to boil their homemade yogurt. I understand their reasoning, but even though we milk our own animals, I still personally feel better boiling the milk. Yogurt incubates at a warm temperature for several hours and we’ve never had a problem when we boil it first.
Yogurt Making Equipment and Ingredients
- Culture or Starter. I’ve found, by far, the culture or starter used is most important. My best results have been the mild ABY-2C culture from GetCulture. You can use store-bought yogurt with live cultures, but I’ve been less than satisfied in my experience with it.
- Incubator. Yogurt is most successful when it incubates at a steady temperature for a specific length of time. The best I’ve found for creating this environment is a large food dehydrator (I like Excalibur the best). I can fit up to two gallons of yogurt at a time and adjust the setting to the right temperature and leave it undisturbed until it’s done. It even does a better job than yogurt makers we used before. Dehydrators are somewhat expensive, so some like to use their propane oven with the pilot light on, slow cookers, yogurt makers, Instant Pots, or even an old woolen sock pulled up around the outside of the jar. (We tried that one and it was a huge flop, but apparently it works for some.)
- Clean glass jars. (choose your preferred size)
- Candy thermometer.
- Large stainless steel pot.
How To Make Yogurt At Home
- Pour a quart of milk into the stainless steel pot. Bring it to a boil.
- Remove from burner, just as it starts to boil.
- Allow to cool to 118-120 degrees F.
- When the milk is almost cool enough, thoroughly wash your jar(s) in warm water. Place 1/16 teaspoon of culture into the jars, dividing it evenly between however many you have.
- Screw on lids and shake well. Place in dehydrator or other chosen incubator.
- Incubate for 9-10 hours. For yogurt with a more sour twang, you may leave it for up to 11 hours. Keep in the refrigerator for several hours and sweeten with maple syrup, honey, or fresh fruit for a health-full treat.
Learning how to make yogurt at home takes dairy products to a new level. Gather your ingredients and equipment, and start enjoying this new dairy delight today!
Kenzi Knapp desires to proclaim the reconciliation of Mankind through the blood of Jesus Christ. A homeschool graduate currently enrolled in God’s Great Course of Faith, Kenzi lives with her family on an Ozark homestead. She enjoys writing, biking, playing the piano and mountain ocarina, studying history, and encouraging young women to build Christ-centered cottage trades at her blog, Honey Rock Hills.
What temperature should we set our dehydrater to? I love the idea of using it.
Hi Sandy! On my dehydrator,which runs pretty true to temperature, I’ve found the best setting is 115-120 Fahrenheit. Happy yogurt making to you. 🙂
I use wide-mouth quart canning jars with lids and rings, and a couple of large insulated cups with snap-down lids. Store bought starter of plain or vanilla yogurt with active cultures has always worked fine for me. Aldi or Hiland are the brands I usually use. I put my starter in ice cube trays, and one cube is one quart of yogurt. Just thaw them ahead of time and put them out on the counter in a container to be at room temperature. I pour hot water in my jars while the milk is boiling so they don’t break when the hot milk is poured in. After it’s boiled, I pour the milk in the jars and put them in the fridge for an hour. The first few times I did this, I used a thermometer. One hour is perfect for my fridge. After an hour, put the starter in, lids on, shake it up well, and put the jars in the insulated cups and fill them with the hottest sink water, snap the lid on, and wait 8-10 hours. They come out thick and creamy every single time.
Great suggestions! Thanks for sharing!
putting hot/warm jars in the fridge is not a good idea. Your fridge needs a lot of electricity to cool the warm stuff. Better let the jars cool down on the counter top (in winter outside). If you do not do it for your wallet, please do it for the climate.
But, thanks for the Aldi suggestion and the idea to put them in ice cubs trays!