


By Jan Hatchett
One of the things that can become painfully clear around our cabin is that hobbies can become very expensive unless we work very hard to control costs wherever we can. Horseback riding and the responsibility of owning a horse has proven to be quite beneficial for our oldest son, but has also proven to be quite costly in the tack department. While I am not able to replace every purchase with a home crafted alternative, I am able to save a bit of money on a few fronts, one of which is by making sets of rope horse reins for riding. Depending on the choice of materials used, these can be customized for English or Western riding styles. This tutorial is for Western-style reins to use on a large frame American Quarter Horse.
Items Needed to Make Horse Reins from Rope
- 8 feet polyester blend twisted rope with ¾ inch diameter (adjust length as needed, shorter for pony reins, longer for draft horses)
- 2 mm nylon thread used for leather work
- Needles to fit 2 mm thread
- Rotary cutter and protective mat
- Scissors or sharp knife for cutting rope.
- Lighter
- Rotary cutter mat with grid for measurement
- Box cutter with sharp blade
- Ruler
- Leather punch
- A scrap of top shoulder leather
- 2 – 3/8 inch Snap Hook with Swivel Eye (can be salvaged from existing worn out tack if in good condition)
If you purchase your rope at a local home improvement store, you can have them cut it to length and heat the ends for you to eliminate fraying. The machine they use to do this will leave a nicer finish than if you burn the ends at home.
We researched horse rope rein styles, sizes, and dimensions online, but—ultimately—we were able to borrow a set of great horse reigns from a friend who is a riding instructor and used them for a pattern. If you have a pair of worn reins to use or to measure from, it can be really helpful to use them.
How to Make Horse Reins out of Rope in 6 Easy Steps
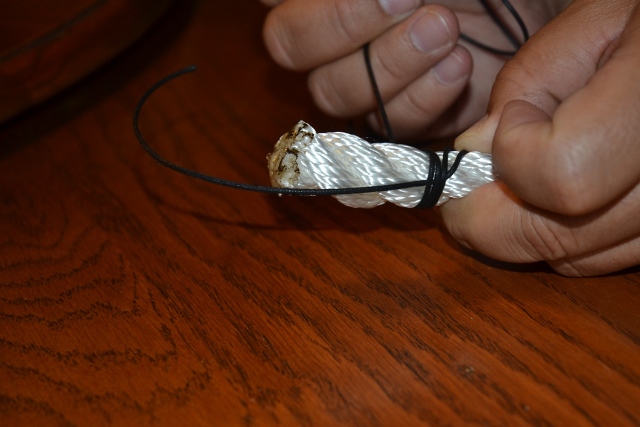
Step 1. The first thing you will have to do is whip the ends to further reinforce them as we are using twist rope for a cowboy feel. If you use standard 5/8 inch double braided rope, you can avoid whipping the ends as you can sew through the solid core of the rope. If you have ever worked with a Boy Scout troop, you may remember instructions for whipping ends of rope. If not, you can always look it up in a Boy Scout Manual or view one of many videos on YouTube.
Step 2. Next, measure and cut out the leather pieces that will cover the whipped and burned edges of your rope. We used a rotary cutter with a new blade against a metal ruler. As a sewer and quilter, I already had the protective mat at home, but do keep a designated rotary cutter on hand to strictly use for light leather work.
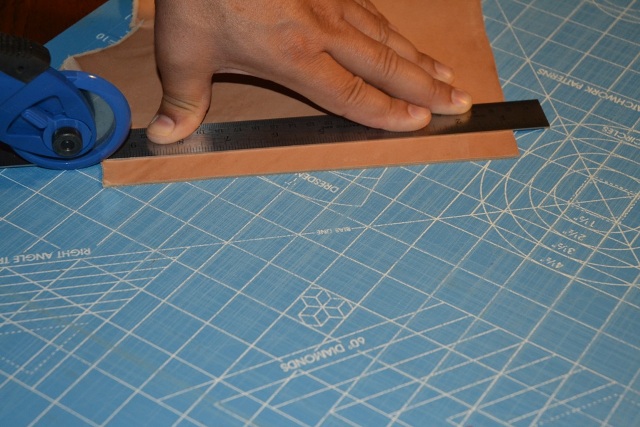
You can use a box cutter with a sharp blade to do the cutting as well. Be sure to use a well protected surface if you don’t have access to a rotary mat. You can approximate the rounded edges by making lots of small angled cuts or leave them as 45 degree cuts on the ends or even as blunt cuts. It’s totally up to your idea of aesthetics.
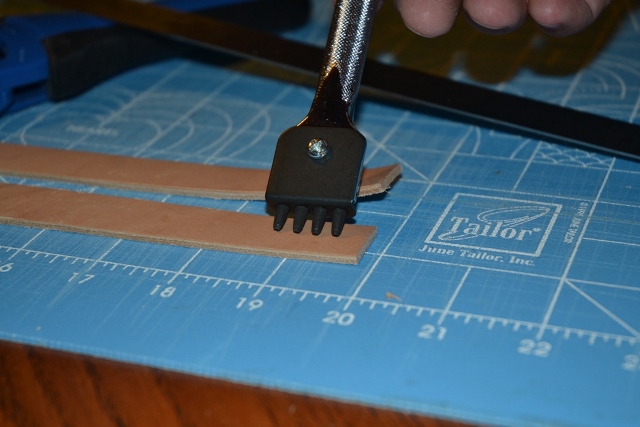
Step 3. Use the four prong leather punch to open up four holes in the center of the base of either side of the leather straps. If you don’t have a leather punch, you may mark the holes and use a hammer and awl to create small, evenly spaced holes on either side. Make sure they are aligned vertically down the center of each side of the strap, so that they will align when they are folded over the end of the reins on either side.
Step 4. Slide each of the leather strips through the base of one of the swivel clips and fold it in half, finger pressing in in half, aligning the holes, making certain that the holes remain open.
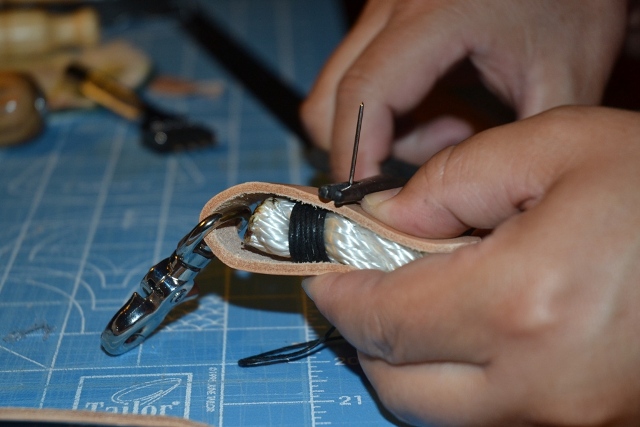
Step 5. Open leather straps and center them over the ends of the rope and using two leather working needles and the 2 mm thread, sewing through the holes in the leather on both sides and the rope in the center for strength. See photos for proper placement regarding where the rope is reinforced by whipping stitches.
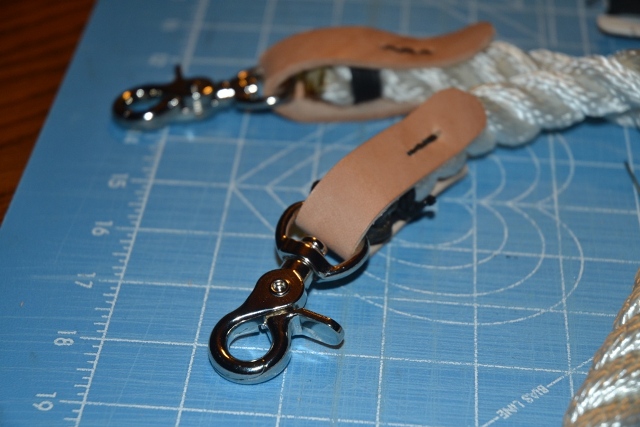
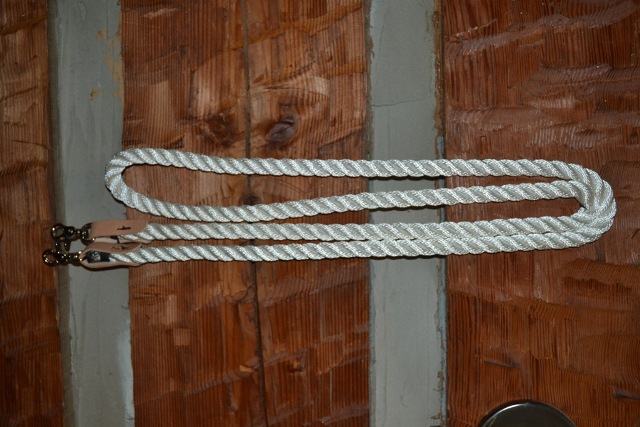
Step 6. Once both sides are completed, knot your threads and cut them off. Give each side a solid tug to ensure that everything is secured properly. Congratulations! You have created your first set of Western riding reins.
This process may sound difficult at first, but after making the first set, each successive set will go faster and easier. As a matter of fact, you can have reins to match saddle pads, show clothing, or anything you like. If you stick with 5/8 inch, double braided rope, you can find a plethora of colors or designs. These reins could also be a great gift for the Pony Club set or contest prizes. The sky is really the limit with these.
One word of caution about scale. Do consider the size of your rider and his or her hands when choosing your rope size. My son loves the 3/4 inch twisted rope reigns. He will use them for shows and ACTHA rides. They look Old West Cowboy to him. He is also 6 feet 9 inches tall. It’s perfectly in scale for him and the size of his hands. It works well for my hands also. I tend to grip reins too tightly and my hands cramp. Larger diameters help me with this, but, your mileage will vary. There is a very good reason why 5/8 inch rope is an industry standard. When you purchase rope. Really hold it and imagine how it will feel as reins. It makes a difference.
Jan Hatchett is a Christian wife and homeschooling mom of two amazing sons. She enjoys log cabin living, writing, quilting, crafting, sewing, reading, and horseback riding. For more of Jan’s exploits, check out: www.anotherhatchettjob.wordpress.com.