


By Lisa Barthuly
Canning is my favorite method of food preservation! I love the whole process of growing or picking your produce at its peak and canning it up! Learning to can, if this skill has not been passed down to you, can be intimidating. However, it is really very simple. There are two methods for canning: water bath canning and pressure canning. In this canning 101 guide it’s all about “Water Bath Canning!” We’ll have our supplies at the ready, gather an understanding of how canning works, and learn how we can fill our pantries based on the seasonal bounty we are given. Canning is a required skill at our homestead, everything from applesauce to pie filling, soups, sauces, meats, and meals!
Things Grow In Their Proper Season
One of the benefits of canning is that it allows us to take advantage of a seasonal rhythm to our food, just as God gives it to us. Example: Strawberries are at their peak in June (generally speaking, locale depending). They are abundant and I can get them at their peak of freshness and at the best price during this time. This is when I process them. We enjoy them fresh, freeze a few (I am not big on freezing just because a power outage that lasts more than a day means I lose everything in my freezers), and can jams and berries. I have captured the berries at their peak and “put them up” for the year.
If I am seeing strawberries in my local store’s produce section in December, something is just not right with that . . . and they will be SUPER expensive. God has an order to things, how things grow in their proper season. Strawberries in December? Not their “proper season.”
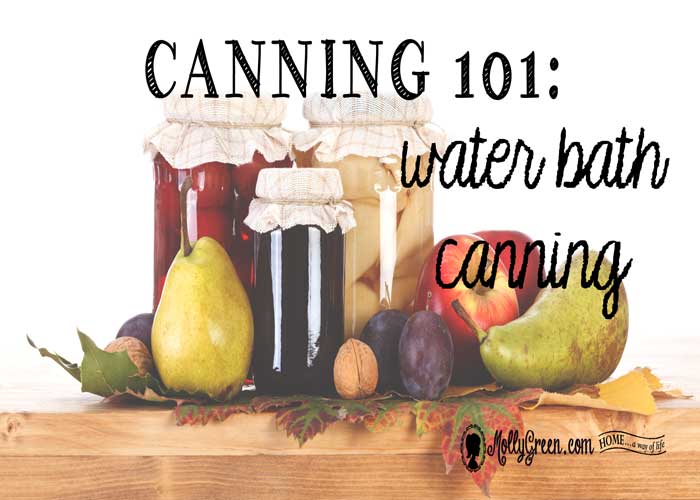
Water Bath Canning
Water bath canning is the process for preserving fruit and vegetables with a high acid content. Water bath processing brings the boiling water temperature to 212 degrees, which will kill any bacteria that is hanging around on your food—even after you’ve prepared and washed it!
If you live at higher elevations, you will need to adjust your processing time. For each 1,000 feet above sea level, the rule of thumb tends to be add one minute—check your Ball Blue Book and know your elevation. Most foods will process in 10–90 minutes—depending on the food, style of packing, and jar size. I always recommend referring to your Ball Blue Book. Canning is fun (and a bit addictive! Okay, VERY addictive!) and some very simple safety tips, used every time, will ensure great results!
Canning is a lifelong, year-round endeavor for me. I enjoy it and it is a blessing to our family. It is very simple to do. It takes time and effort, but as I like to say, “Anything worth doing” does! Learning how to can doesn’t have to be intimidating. With the proper equipment and instruction, you’ll be lining your pantry shelves with wholesome food for your family in no time!
Supplies and tools you’ll need to get water bath canning!
Must Haves:
- Canning jars
- Deep kettle with jar rack
- Canning jar lids and rings
- Lots of old kitchen / hand towels and hot pads
- Canning tongs and wooden spoon
***************************************************************************
First and foremost—a Ball Blue Book of Canning is a must have. I found mine at a Walmart many years ago. You can still find them there, at Amazon.com, or any place that sells canning supplies and equipment. It is the “canner’s Bible.” I constantly refer back to mine each year for canning times, if nothing else, and that is a huge factor in canning. It is “the” reference guide and manual for canners. Enough said.
Canning Jars
Jars! You can buy canning jars, again, at any store that carries canning equipment. They can range from $8 to $15 per case of twelve. I scour garage sales in the summer hunting good canning jars. In fact, this past Friday I found three boxes with fifteen or more each in them for a total of $12. That is a pretty good deal! When buying from a secondhand source, be sure to pick up every jar and inspect it for cracks and for nicks in the mouth of the jar. If the mouth of the jar has one little nick in it, the lid will not seal or if it does it won’t hold or will result in bad food that could possibly make your family sick. Make sure to double check the jars!
I often hear, “What size jar do I use?” Well, that depends on your family. Are there two of you? More than likely half pints and pints will work (depending on what you are canning and your preferences). If you have four or more in your family, chances are a half pint of anything is a waste of time and effort—you might want to can in only quarts!
I use a variety from half pints to quarts, depending on what I am canning. Anything larger is NOT recommended, as you may not get your food to hot enough temperatures, evenly, inside the jar due to its size, and therefore your food can end up being unsafe. I tend to can in quarts for the most part, that serves our family well, fits my canner well, and saves me from wasting lids.
Kettle And Rack, Jar Lids And Rings
A deep canning kettle and rack are for water bath canning and can be bought online or anywhere that sells canning equipment. Or you can look to relatives who possibly don’t can anymore, or estate, garage, or tag sales. I picked up the two I have at garage sales for $1 or less each. They’ve served me for years!
Canning jar lids and rings. You will need brand new lids to seal your jars. Lids have long been that of the metal with rubber seal, one-time-use-only variety. Those are great, I’ve used them for years—and the rings, are obviously something you save and use repeatedly. I’ve stocked up on these through a couple places where I found the best prices: Azure Standard as well as at Lehmans where you can get a great deal on them in bulk! I’ve also discovered REUSABLE canning jar lids. These are fantastic and can be found at www.reusablecanninglids.com. I’d highly recommend checking into them. Great to have on hand, especially when running to the store for more disposable lids is not an option.
Lots Of Towels And A Good Set Of Tongs
You will go through a lot of towels between setting jars on them to wiping rims (the rims of the mouth of the jar must be perfectly clean to meet with the rubber on the lids and form that seal)—and the occasional mess clean up! Have a bunch on hand; garage sale or thrift stores are a great place for these if you don’t already have them.
You’ll want canning tongs (this is just what I call them—they are just “tongs” that you’d use in everyday cooking) and a wooden spoon as well; simple things that make the job easier. Canning tongs (or a plain ol’ dinner fork) will lift your lids out of very hot water (unless you are blessed with a magnetic wand lid lifter—see below!); enough said. Having a wooden spoon (or a chopstick) on hand is great for poking down into your filled jars to release any air bubbles. I pick up extra wooden spoons at garage sales often, I love to cook with them and the old ones are sturdy and last!
Nice-To-Have, But Non-Essential Items
Some other nice but you-can-get-by-without things for water bath canning are the canning funnel to keep your foods in the jar and save you messes and loss of spilled/lost food. I have a plastic one and a stainless steel one—love them both and they’ve saved me countless messes! A jar lifter is quite handy, a really great tool to safely lift your jars out of the water. This should be on the “must haves” list, but you can let your water cool and then get them out too. The magnetic wands they have out these days are pretty nice, but then again, an old pair of tongs or a fork will do the job as well. A ladle would be wonderful for scooping hot jam or soup or chili into jars, but an old coffee mug does the job too.
It Shouldn’t Cost You A Lot Of Money
As you can see, much of your water bath canning equipment can be picked up pretty cheaply (think grandma’s attic, thrift store, and garage sales), and it’s completely worth it! The food you preserve is tastier, healthier, and just all around better for you and yours; not to mention it is a great way to stock the pantry as foods are in season and at their best price! Truly this is the only way for me to get healthy foods on my table year round. Once you start water bath canning, you will realize how tasteless and overpriced the toxic foods at the store really are. Have you priced “organic” foods at the store? Canning is the answer! When I am not canning I attempt to keep all my canning “stuff” tucked away in my water bath canner on the shelf. That way, it’s all easy to find for the next batch of whatever I am blessed to put up for my family!
Some other items you’ll want to have stocked up for water bath canning
- Pectin: You can buy this by the little box or in bulk. You can get varieties from no sugar, to some sugar, to full sugar, to all natural (Pomona’s Pectin).
- Canning salt: Lots of varieties, and every canner has its own preference. There is standard, in-the-box canning salt. Also kosher salt, sea salt … the list goes on. Use your favorite (just not standard “iodized”). I like kosher sea salt.
- Sweeteners: Some folks use good ol’ “C&H Sugar®.” Some use raw honey, some use organic sugar, and some doesn’t use any sugar but use grape juice in their jams (I do all of the above depending on the recipe and my family’s preferences). Whatever you choose, have it on hand.
- Vinegars: White and apple cider (Braggs® is fantastic).
That’s our items needed list for water bath canning. Now when you are ready to start canning, you’ll want to get prepared ahead of time.
Canning Equipment And Canning Preparation
- Gather all of your canning utensils and equipment; get everything set up and ready to go ahead of time.
- Place your water bath canner, filled half full with water, on the fire or burner and bring it to temperature. Make sure your rack fits in your canner. Make sure the water level in your canner covers your jars by 1-2 inches of water when they are immersed for processing. (I use the water in my jars—see step #3—when I am ready to start filling them with food, to continue to fill the canner as needed to level, rather than waste the water)
- I wash and rinse my jars in HOT water and fill them with HOT water and let them sit to temper the glass so as not to crack my jars when they hit that boiling water. Some folks will keep them at temp in their oven on its lowest setting. Some folks will put them in their dishwashers and have them hot and ready to go. It’s all personal preference; the goal is to have hot jars so they do not break when they hit the hot water. (Once you start canning, you’ll hear that “CRACK” sound and it’s not music to your ears—you just lost a jar and the food you had in it.) While I am doing this, I always double check all of my jars for any chips or cracks. I repurpose those jars out to the barn for storage containers, for screws, nails, etc. You can never have too many jars!
When canning, never reuse your lids. You don’t want to end up with botulism or jars that don’t seal! Unless of course you are using Tattler Reusable lids! Canning is not where you take short cuts, period. Always follow the strictest safety measures!
- Once I have all my equipment and jars prepped, I am ready to can!
- Depending on what I am canning, I will prep my food as needed to time it out so I have my food that I am canning and my equipment all prepped at the same time.
- Always cool canned jars/food on a thick towel that you’ve laid out ahead of time, for 24 hours, out of any drafts. This will ensure a slow, proper cooling of the jars, and setting of the lid / seal. At that time, I press my finger down on all lids, real quick, just to make sure there is no “give” to them; they shouldn’t pop up and down. If they do, they are not sealed. If you have any jars that didn’t seal, get them in the fridge right away and eat them up. Some folks reprocess them; I don’t do this for one or two jars. Most often, all my jars seal. I then mark the lids with the month / year and what is in them with a permanent marker (or if I will be gifting them to someone or am putting them up to give as gifts later, I’ll put a pretty label on them).
A Way Of Life
Canning is just a way of life for us, it helps me care for my family and be a good steward of what He provides us with.
Excerpt from The Provision Room, Lisa’s new title due out fall 2014.
Lisa Barthuly lives in the mountains of the American Redoubt with her mountain man husband, amazing children, a few dogs, and a menagerie of farm animals. She is a Follower of Yeshua, Torah Lover, Helpmeet, and Mama! She enjoys a simple, home-centered life, built on God’s foundations; studying scripture, homeschooling, scratch baking, cooking, canning, candle making, and gardening. She’s the family herbalist, enjoys rich coffee and cream, reading, and loves a round of competitive target practice! Visit her at her “homestead on the web” at: www.HomesteadOriginals.com.
Hi there Ms. Lisa, I want to thank you for your article but mostly for including God in there. It’s so good of you to give credit where credit is due. Blessings onya! Darlene, Child of the Most High