


By Melissa Norris
When I first started baking all of our own bread at home, I had no idea that all store-bought flour had been stripped of its vitamins. That little word “enriched” should have been my first clue. That’s just one of the reasons we decided to grind our own flour at home and bake with fresh-milled flour, but it’s a major one.
There is something about grinding my own flour in the kitchen that makes me feel like a homesteader of old. I also have a deep love of baking and all things bread, so I’ll take an apron and a bread bowl over a little black dress any day.
Wheat Berries Benefits and Storage
I started making fresh-milled flour at home when we began increasing our food storage. Wheat berries will store much longer than flour and can also be cooked and added to soups, salads, or even a cereal. When stored in a dry and dark area, wheat berries will last for years, unlike flour which lasts usually six months at most. Just in case you’re not familiar with wheat berries, they look like a hard kernel, not a squishy or dehydrated berry. They’re the seed part of the wheat.
Grinding your own flour at home is also much healthier than purchasing flour from the store, even whole wheat flour. There are three parts to a wheat berry: the bran, germ, and endosperm. The germ is an oil where most of the vitamins and minerals are. When you grind the wheat berry up into flour, the germ oil is exposed to the air. Once exposed to the air, the germ goes rancid after a few weeks. Not only that, but when the vitamins and minerals are exposed to air, they quickly begin to lose their potency.
This is the very reason that when you read any bag of flour you see the words “enriched with vitamins and minerals.” In order to make the flour shelf stable, they have to strip the oil from it—and with it, all of your vitamins. This discovery alone helped me make up my mind to step into the world of home flour milling.
How to Grind Your Own Flour
Now the first step in baking is getting out the grinder and grinding my flour. If you’re not sure which kind of home flour mill is right for you, you’ll want to check out my post on the topic. Though you can grind your flour at home and store it in the freezer, I choose to use ours as I grind it. Besides the nutritional and preparedness level of grinding your own flour, your yeast-based goodies will give a better rise due to the flour being warm when it’s freshly ground. This works wonderfully for rolls and breads.
Tip: If baking pastry or pie crusts, grind the flour an hour ahead of time and chill in the fridge.
One of the fun things about grinding your own flour is using different types of wheat berries. This is also where a lot of folks get confused and think all whole wheat flour creates heavy and dense products.
Hard Wheat vs Soft Wheat
If you’re just switching from regular all-purpose flour and use hard red wheat, you’re going to find it harder to bake with and that it creates a heavy bread. While I might be willing to stick to something because it’s healthier, my husband and kids aren’t. If it doesn’t taste good, they’re not going to eat it. I don’t know about you, but I don’t have time or money to waste.
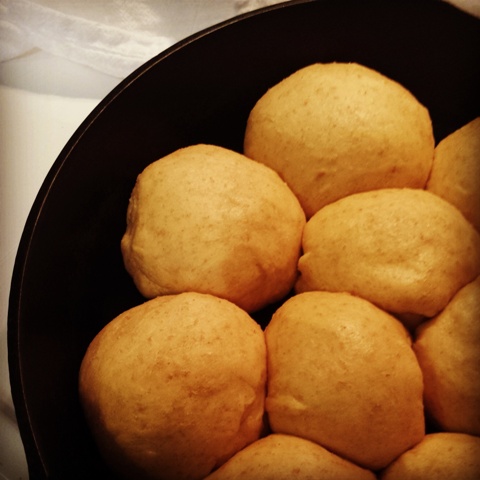
When you first start out baking with fresh-ground flour, you need to know the difference between hard and soft wheat. Hard wheat has more protein in it, which means it has more gluten, and gluten is what gives the wonderful structure and rise to a fluffy loaf of bread. In terms of bread and things that need to rise, gluten and protein are our friends.
Soft wheat has less protein in it, and this is where my pastry baking heart gets all kinds of excited and ties those apron strings on lickety-split. Soft wheat (a.k.a. pastry flour at my house) is what I use for muffins, cakes, pie crusts, cookies, and anything else closely related.
Different Types of Wheat
Now that we know the difference between hard and soft wheat, we need to look at the different types of wheat. Most people are familiar with red wheat, but I rarely use red wheat in my baking and cooking—though it does makes a great tortilla. If you’re looking for flavor and texture similar to all-purpose flour, then you’ll want to start with white wheat. It’s lighter in color and tends to produce a lighter bread loaf for me as well. Hard white wheat is what I use for all of my bread and roll baking.
Heard the words “ancient grains” thrown around lately? Most strains of modern wheat have been hybridized. This doesn’t mean genetically modified—two different things all together. But it does mean that modern wheat has more gluten in it and less protein than ancient wheat. It produces more wheat per head and yields a larger crop. An old-fashioned girl, I like to use heirloom goods and seeds on our homestead. However, ancient grains are more expensive.
My favorite and most frugal ancient grain is spelt. Spelt is mentioned by name in the Bible, and every time I see it while reading I have the urge to highlight it because I think it’s pretty cool, and it is one of the more inexpensive ancient grains. It’s also what I use for my soft wheat and/or pastry flour. Spelt does have some gluten in it, but much less than modern wheat or hard wheat. It also has a higher protein count.
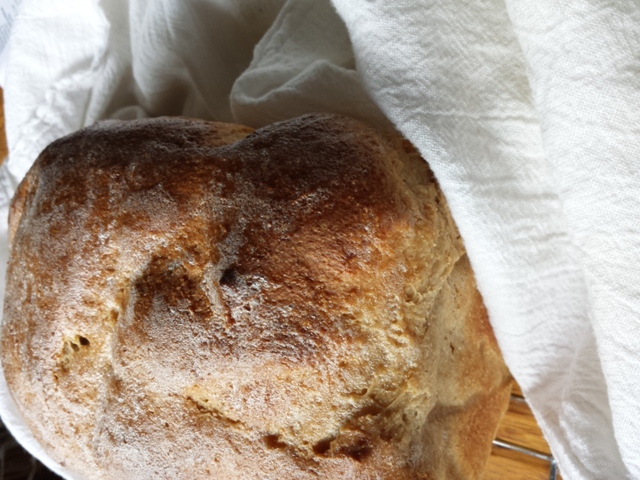
Tips For Baking Bread With Fresh-Milled Flour
When you first start baking with fresh-milled flour, you’ll need to remember that it absorbs moisture much more than regular flour. You’ll think the dough is too runny when you first mix it up. But, don’t add more until you’ve let the dough sit for about ten minutes. Then, if it’s still too wet, add a tad more flour. Most times, you won’t need to.
Many folks (myself included) try to use fresh-milled flour like you do regular flour, but if you overwork your dough, then it will produce a hard and dense loaf. Don’t knead it for the long, extended times that you would with regular recipes using all-purpose bread flour. Knead it for four to five minutes and then let it rest for ten to fifteen minutes before giving it one more short knead of four minutes. I have more tips on my website for baking with fresh flour.
Melissa K. Norris is a plain country girl who loves Jesus, playing in the dirt, stuffing food into Mason jars (after washing her hands, of course), and hunting down as many traditional old-fashioned skills as she can to put into use on her homestead.