


Of all the fiber arts, quilts are the most amazing. Not only are quilts lovely to look at, but they tell a story. In this beginner’s guide to quilting, you’ll learn how to make a quilt from beginning to end– so you can tell a story of your own.
Quilts tell tales of important family events, celebrate marriages and babies, document travel, and preserve memories. They not only keep you warm, but they are works of art.
There is no better time to learn how to make a quilt. Yes, quilts are a bit of work to make, but the rewards of creating something so useful and expressive are worth the effort. The fabric options available today are wonderful, diverse, and oh-so-appealing.
It’s hard to go into a fabric store and not have your mind churn with creative ideas for the luscious patterns and colors. Fabric companies are even creating gorgeous palettes for coordinating pre-cut fabric that makes quilting easier than ever before. Check out these quilt jelly rolls![]() for some real inspiration!
for some real inspiration!
Learning how to make a quilt is one of those traditional skills that is just cool to know. There is a misconception that quilting is too laborious and time-consuming, but that does not have to be the case.
About This Quilting Guide
In this beginner’s guide to quilting, we will break down the basics of quilting and then show you how to make a quilt with a beginner-friendly quilting project that you can accomplish in a reasonable amount of time.
First, we will go through the simple steps to create a beginner-friendly bed quilt. After learning the basics of quilting, you can apply these skills to other beginner-friendly projects such as mug rugs, quilted table runners, and bandana picnic quilts.
Ready to finally learn how to quilt? Let’s get to it!
How To Make A Quilt – Easy Navigation
Step 1. Quilting Supplies You Will Need
Step 2. Learning How To Quilt Starts With Planning
Step 3. Buying Your Quilt Fabric
Step 4. Prewashing Your Quilt Fabric
Step 5. Cutting Your Quilt Blocks
Step 6. Piecing Your Quilt
Step 7. Quilt Backing Fabric and Quilt Batting
Step 8. How To Baste A Quilt
Step 9. Machine Quilting And Quilting Stitches
Step 10. How To Bind A Quilt
Step 11. Washing A Quilt And Proper Storage
Step 12. Beyond Quilting 101 – Practicing The Quilting Basics
Quilting Supplies You Will Need
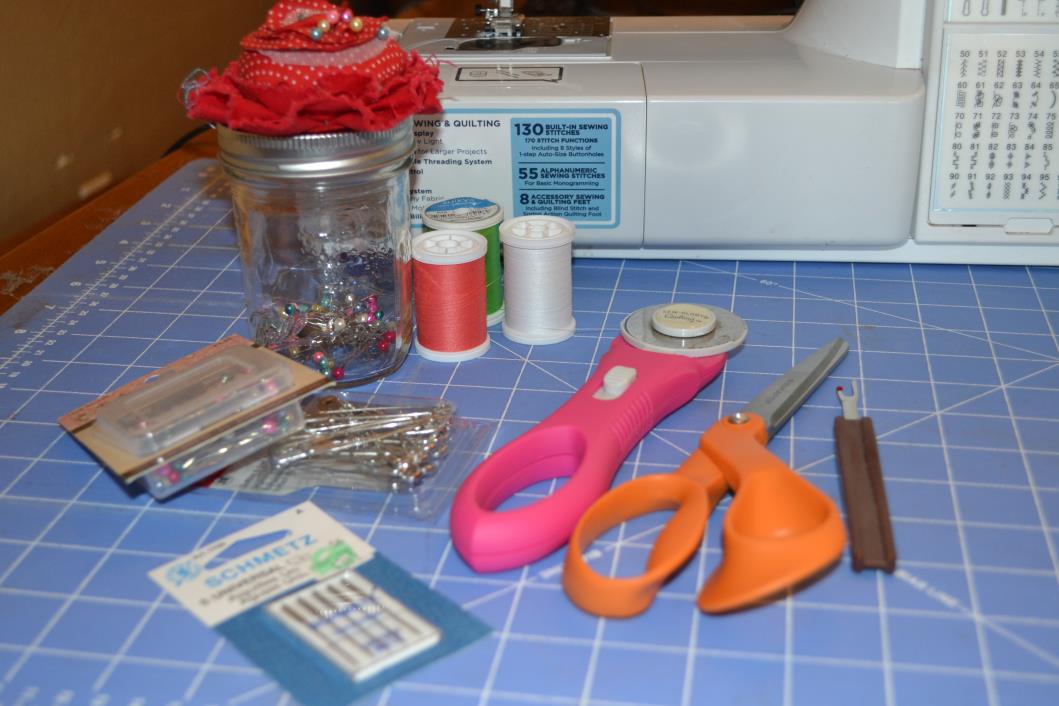
Before we start quilting, make sure you have everything you need. It’s unbelievably frustrating to begin a project like this only to discover you are stuck because you forgot some critical quilting supplies.
If these items are not in your budget, get creative! Buy second-hand or trade or borrow from a friend. The possibilities are endless.
Here is a supply list for beginning quilters
Sewing machine – You can hand sew, but it will take you much, much longer to complete your projects. If you don’t own a sewing machine, consider borrowing one or buying one second-hand from Craigslist or the classifieds to make this large purchase affordable.
Needles for your machine – It’s a good idea to have at least one or two replacements.
Thread – Get a little more than you think you will need. If in doubt, ask one of the people working at the fabric store to help you estimate. In my experience, the people working on the cutting tables are very knowledgeable and helpful. Choose either a coordinating color or a contrasting color according to your personal preference.
Fabric shears – These are very sharp scissors that should only be used for cutting fabric (they dull when used for other purposes).
Thread scissors – These are not entirely necessary, but are nice because they are small and easily maneuverable, making it easy to reach tight areas to cut thread.
Pins – You will be using quite a few of these! Consider buying standard pins (glass-head pins are very nice), quilter’s pins and basting pins.
Rotary cutting tool – This is technically an optional item, but it makes it SO much more comfortable to cut your blocks. Consider splurging here.
Self-healing cutting mat – This is necessary only if you have a rotary cutter, but again, this item is well worth it, especially if you plan to quilt regularly.
Presser foot – Presser foots are wonderful for creating uniform seam allowances.
Batting – Batting is the inner layer to your quilt and what makes it substantial, thick, and warm. You can use any thickness of batting you’d like depending on what you’d want. Batting comes in various fibers such as cotton, wool, polyester, and even bamboo fiber. There are also other materials you can use for batting such as upcycled sheets or blankets you have at home already. Flannel sheets, fleece blankets, felt, etc. can all be used for batting.
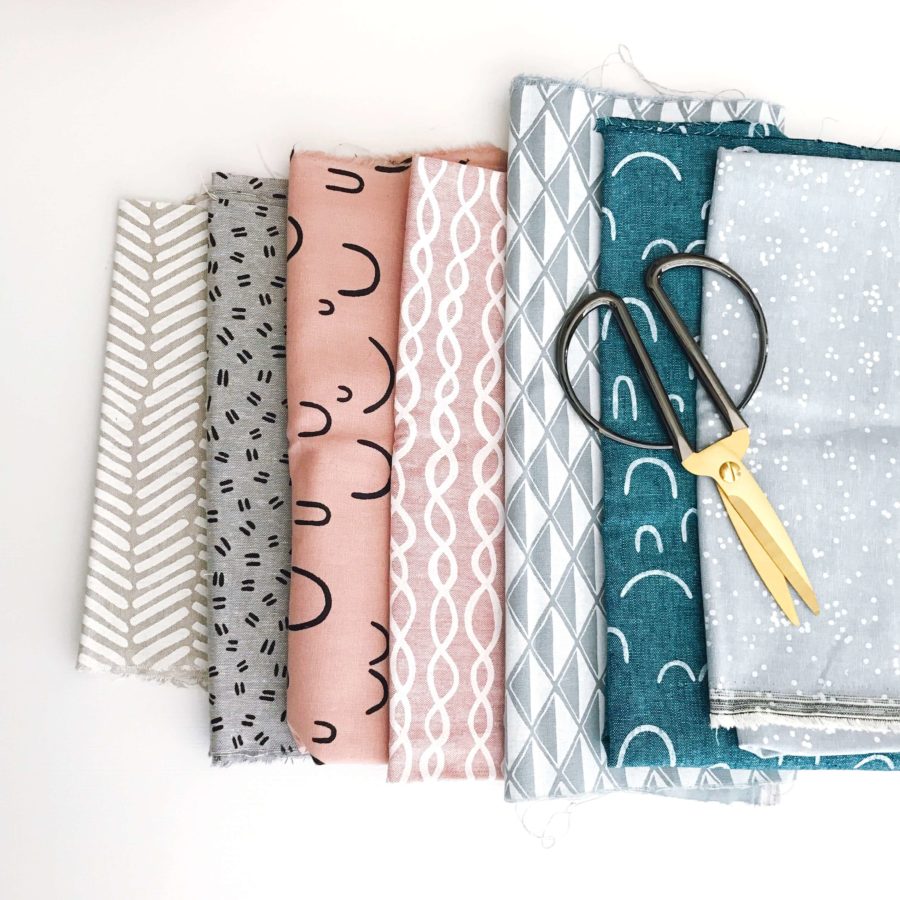
Front fabric – Finally, you will need fabric. This is the fun part! Browse and see what catches your eye. You can mix and match patterns yourself, or use professionally coordinated fabrics. The choice is yours. Enjoy being creative and putting together a blend of materials that makes you happy.
Pro Tips
A good number to start with is around six different patterns. You can use a bit more or a bit less if you choose.
Although you can choose a variety of different fabrics to quilt with, we prefer cotton. Cotton is natural, and it performs well, washes easily, and feels nice and cozy.
It is a bit of a controversy whether to choose fabric first or choose your pattern first. For this beginner’s guide to quilting, we say, do what you like. This is an area to let your creative juices flow!
Learning How To Quilt Starts With Planning
You can get inspiration from a variety of sources.
Where To Get Ideas
Libraries usually have an excellent selection of quilting books to pore over and get ideas. Bookstore shelves have a variety of beautiful quilting magazines available, and Pinterest provides an almost endless source of pattern ideas and creative inspiration. Additionally, you can design your quilt! It’s incredibly fun and satisfying to create your piece of quilted art, even if you’re just learning how to make a quilt.
Choosing The Size Of Your Quilt
After you have chosen or designed a pattern, choose the size of quilt you will make. Quilts are usually constructed in standard measurements:
- Twin 68″ x 89″
- Twin Extra Long 68″ x 94″
- Full/Double 84″ x 89″
- Queen 90″ x 94″
- King 106″ x 94″
- California King 100″ x 98″
- Crib 27″ x 52″
- Youth 32″ x 66″
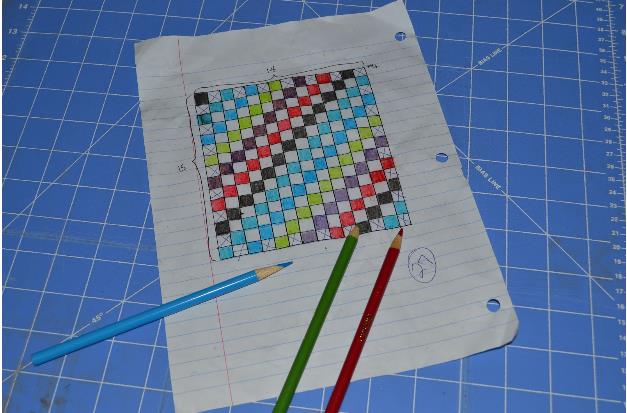
Block Sizes
After you have decided on your pattern and your quilt size, you will need to calculate the size of your blocks. If you are new to quilting, it’s often best to choose a pattern that lays out the block sizes for you. However, if you have some experience or are feeling a little adventurous, you can do the calculations yourself. I suggest using graph paper to help with this. Don’t worry; only basic math skills are needed.
There are also online quilting calculators that you can use to help you determine the size of your blocks.
Buying Your Quilt Fabric
You will need two types of quilting fabric: front fabric that features colors and patterns and backing that will become the underside of your quilt.
Front Fabric
Once you have determined the size your quilt block will be, make sure to add extra for your seam allowance (this is the extra fabric you will use when sewing the blocks together). I use a 1/4-inch seam allowance, so if I were using 5-inch quilt blocks, I would need to add 1/2-inch to that measurement (1/4-inch extra fabric on each side) before calculating the amount of fabric to buy.
It’s no fun to come up short when you are in the middle of your project, so make sure to get enough. In fact, I often add an extra 1/4 yard on top of what I calculate I need to be safe and to allow for mistakes.
Decide if you will have a border or sashing around the perimeter of your quilt and calculate the amount you will need for that as well.
Backing Fabric
Finally, you will need backing for your quilt. Choose a single fabric that will make up the entire back-side of your quilt and calculate the amount you will need for that too.
Depending on the thickness of your batting, you will need to have a significantly larger seam allowance for your backing to compensate for the loft of the batting. I recommend buying an additional 4 inches for each side to make sure you have plenty. Once you have checked and double-checked all your measurements, you are ready to purchase your fabrics.
Don’t forget to inventory your supplies before you go and be sure to pick up your batting and plenty of thread in the right color while you are shopping. Make sure to record all your measurements and totals before you go. You’re almost ready to begin your quilt!
Prewashing Your Quilt Fabric
This is an important step so don’t be tempted to skip the laundering process. Washing removes excess dye, so the colors will not run during future washes.
Also, fabrics may shrink. This factor is less of an issue than it used to be, but you do want to account for shrinkage before you make your quilt to avoid pulling and uneven shrinkage. This is especially true if you are using more than one kind of fabric (like some cotton and some polyester).
Another benefit is that washing removes the embedded fold in the fabric so everything will be uniform and lie flat. After washing, your fabric will be fresh and clean; some quilting fabrics come with a chemical smell when they are new.
How to Wash Quilt Fabric
To wash fabrics, combine like colors and machine wash with warm water. Use a small amount of detergent but skip the fabric softener. (You can use it later if you like, on the finished product.) Dry on a medium heat setting and remove from dryer while still just barely damp. Iron fabric right away to complete the drying process and remove wrinkles.
If you aren’t ready to begin work on your quilt right away, fold fabrics neatly for future use, but you will have to iron again to remove creases.
If you are ready to begin, grab your scissors and remove loose threads from the edges, then you’re all set to go!
Cutting Your Quilt Blocks
Make sure you are starting with freshly-ironed fabric because it makes a difference in the quality of your blocks and is so much easier to cut accurately.
Next, use a rotary cutting tool and self-healing cutting mat to cut your blocks. It is possible to cut all your blocks with scissors, but the rotary tool is quicker and more accurate.
A nice-size cutting mat for quilting is 36 x 24 inches.
Squaring Off Your Fabric
After your fabric has been washed, dried, and ironed, you are ready to begin cutting. The first step is to square off your fabric.
- Fold the fabric in half (usually lengthwise) and match up the selvadges on either side
- Smooth out the fabric and make sure the fold is lying nice and flat
- Line up the edge with your cutting mat and trim off any raw edges making sure to make neat, straight lines
- Cut each side until your fabric is squared up. Be sure not to waste fabric—cut just enough to make your edges straight
Marking Your Fabric
Next, you will need to mark your fabric to indicate where you will cut your strips. You can leave your fabric folded in half if you like, for efficiency, thereby cutting two strips at a time.
Figure out how wide your strips need to be. For example, if you are making simple 6-inch square blocks, mark every six inches on your fabric (fabric pencils are nice for this purpose). Don’t forget to add the appropriate seam allowance for your particular project. Before you cut, re-check your measurements to be extra sure!
Cutting Your Fabric
Now you are ready to begin cutting. Position your ruler along the line you will be cutting. Hold it steady with the hand that will not be cutting, and press the cutting tool firmly against the ruler. Move it slowly away from you, maintaining steady pressure. Readjust the ruler hand as necessary to keep it placed securely. Remember, the rotary cutting tool blade is very sharp.
Watch your fingers! Check each strip carefully after cutting before you proceed to the next piece to avoid uneven or crooked strips. You can always square up the fabric again if you’ve made a mistake.
After you’ve finished your strips, cut them horizontally to create the particular size blocks that your project requires. Cutting is often the most tedious task in quilt-making, but be sure to take your time and cut carefully. You will feel so accomplished when you have stacks of neatly cut fabric ready for you to sew!
Piecing Your Quilt
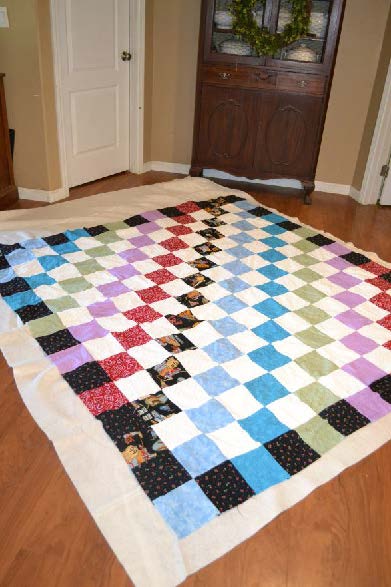
Now for the fun part! Piecing your quilt is the step where you get to see your hard work start to pay off.
Begin by laying out one section of your quilt. The part you decide to lay out depends on your pattern. For example, if you are making a simple nine-patch quilt, lay out all nine squares to make up one complete block. Iron again if necessary, and then begin pinning. Once you have finished pinning your fabric, you are ready to sew.
Pro Tip: Make sure to use the seam allowance you decided on when calculating how much fabric you needed. A 1/4-inch seam allowance is most common.
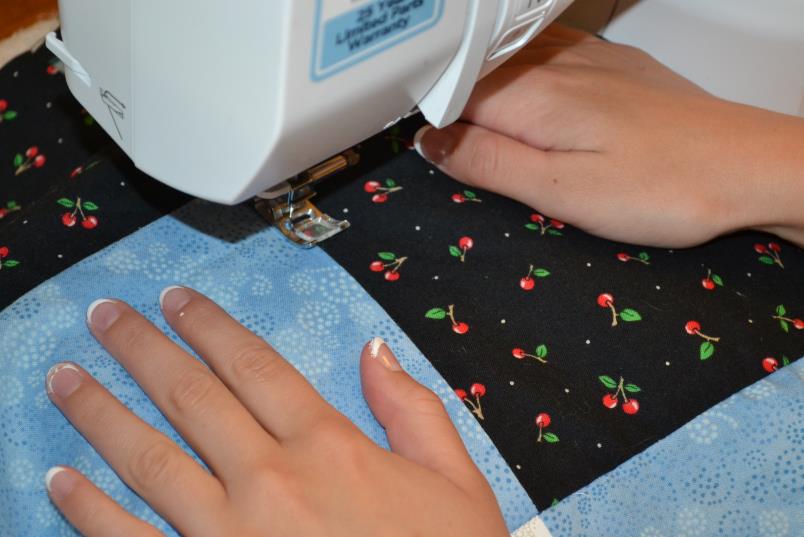
Begin carefully sewing your pieces together and remember to remove pins as you go rather than sewing over them. A broken needle is an avoidable annoyance. Sew one row at a time, remembering to keep an eye on your seam allowance to keep them nice and even.
Piecing your quilt is the step where you get to see your hard work start to pay off.
After each row, press down your seams to keep them flat. Some recommend ironing them open, but we prefer to press them to one side.
Continue with this method row by row until you have finished piecing the entire quilt. Be careful to keep making sure your seams line up nicely as you go.
Quilt Backing Fabric and Quilt Batting
Now you will need to prepare your quilt back.
Quilt Backing
If you are able, use one large piece for the back (some people like using bed sheets for this since they are large enough although this is controversial, as some seasoned quilters feel they are not as durable due to their high thread count and subsequent thread breakage).
We recommend that your back be 4 inches larger than the front to allow for batting.
If one large piece of fabric is not possible or desired, you will need to piece the back together. We recommend that your back be 4 inches larger than the front to allow for batting. Beginning quilters should use a quilt backing calculator to help you determine the amount of fabric you will need to accommodate batting.
For efficient use of fabric, we recommend that quilts up to 60 inches have horizontal seams on the back and for larger quilts, vertical seams. It is also a good idea to increase your seam allowances to 1/2-inch when piecing your back together for additional strength.
Don’t forget to trim the selvedge before sewing and make sure to prepare your backing fabrics the same way you did for your quilt top, washing and ironing as needed.
Quilt Batting
Next, you will need to prepare your batting (also known as wadding in the UK and Australia).
What you choose for batting is a personal choice and we recommend researching or chatting with a knowledgeable person at the fabric store before making your decision. You can purchase pre-cut batting in standard sizes such as crib, twin, queen, etc. or you can buy batting on a roll and cut it yourself.
…it’s a good idea to unpack your batting and unfold or unroll it the night before you use it, giving it time to relax.
You also need to determine the material (cotton, wool, polyester, a blend, etc.) that you want to use based on your needs and desires. You will want to consider loft (the weight and thickness of the batting). You may also want to consider warmth and price when choosing batting.
Once you have made your choice, it’s a good idea to unpack your batting and unfold or unroll it the night before you use it, giving it time to relax. This will provide you with a smoother finished product and avoid bumps from fold lines.
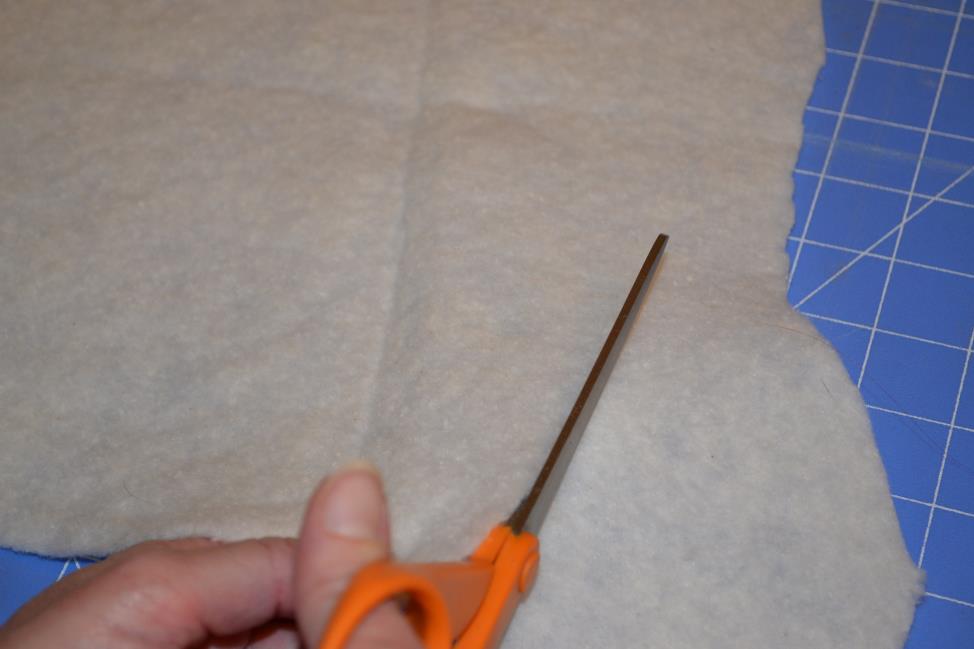
Now you are ready to cut your batting. Even if you have purchased a standard size batting, you will likely need to trim it some. The batting needs to be cut larger than the quilt top but smaller than the quilt back. Somewhere about halfway between the two measurements works nicely.
After your backing and batting have been cut correctly, you are ready to move on to assembling your quilt.
How To Baste A Quilt
This is a fun step where you will begin to see your quilt take shape. Essentially you are making a sandwich as you assemble the quilt top, the batting, and the backing.
There are several ways to do this, including pin basting, spray basting, fusible basting, and thread basting. However, the two most common methods are pin basting and spray adhesive basting. We prefer pin basting, but feel free to research the other methods and adjust as necessary.
Next, you will need to decide where you want to work. Because of the size of many quilts, it’s easiest to work on the floor. Other options include laying down a sheet of plywood over an existing table to increase its size, or even using something like a ping pong table if you have one. Use whatever surface gives you plenty of room to work.
Laying Your Quilt
Start by laying out your quilt back the wrong side up. Some quilters recommend taping the backing down every few inches to keep it pulled tight. After your back is spread out and smoothed flat, layer on your batting, followed by your quilt top (right side up).
Use either 1 1/2-inch safety pins, or 1 1/2-inch basting pins to begin pinning all three layers together every 3–4 inches.
Start in the middle and move outwards to the edges. If you would rather not be bothered by having to remove pins constantly as you sew, be mindful about how you place your pins, and avoid areas that you know you will be sewing over.
Pro Tip: To give you some idea, you should have at least 100 pins in a twin size quilt, and as many as 500 for a full-size quilt. Again, this is a topic where people’s opinions vary widely, but I would err on the side of generosity and use more. Once you have your quilt sandwich securely pinned, you are ready to begin sewing!
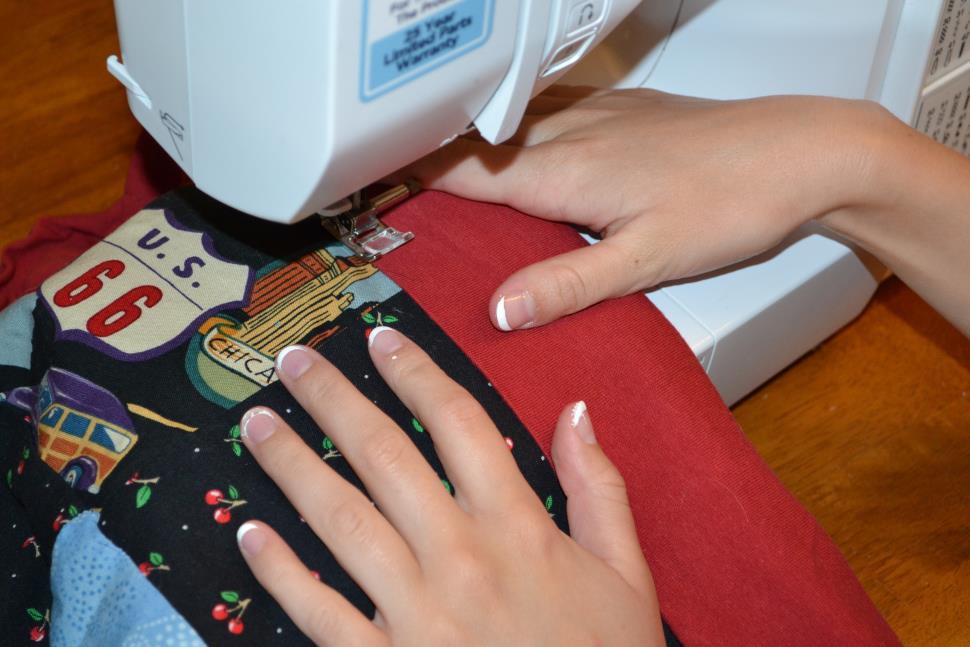
Machine Quilting And Quilting Stitches
There are various options for quilting, but I will be focusing on machine quilting. It is possible to have your quilt professionally quilted or to hand quilt, but the most common choice is home machine quilting.
Quilting is what gives a quilt its personality. At the most basic level, quilting merely holds the quilt together, but the design gives dimension and additional artistry to the piece. Let your creativity dictate what you decide to do. Simplicity can be beautiful, as can an intricate design. Choose whatever makes you happy and what your skill level allows.
Stitching
As far as stitching goes, there are many options for this as well. The simplest method is called “stitch-in-the-ditch” and this is a good place to start. You simply use your seams to guide you, sewing just next to them until you have finished the entire quilt. This is a lovely option and produces a nice product.
Just slightly more complicated than following the seams is straight quilting. In addition to following the seams, you can create diagonal lines, parallel lines, perpendicular lines, etc. This method also produces a very nice finished product.
Numerous quilting templates are available as are staples such as chalk pencils and old-fashioned rulers. Once you have marked your pattern on your fabric, to follow a more complex pattern, the quilter uses a method called free motion quilting. This approach allows the quilter to freely move the fabric in any direction to follow an intricate design. It usually takes some practice to become adept at free motion quilting but is rewarding to master!
Sketching And Marking Your Pattern
There are of course many more quilting options allowing you to get as intricate and as fancy as you’d like. If you want to try something more adventurous, many products are available to help you design your pattern. Many quilters recommend sketching out their quilt on paper and then drawing in the design they’d like to quilt over that.
Try several different designs if you’d like to see which you like best. Once you have chosen your design and marked your pattern on your quilt (using something like a chalk pencil or fabric pen with disappearing ink), you are ready to begin quilting.
How To Begin Stitching
Use 100 percent cotton thread in the needle and the bobbin and a universal size sewing needle.
You may need to adjust the stitch length and possibly the tension depending on the method you use (stitch-in-the-ditch, straight line, or free motion) as well as the thickness of your quilt. You may also want to change the foot you are using. For the two more straightforward stitching methods, use a walking foot. For free motion stitching, you should use a darning foot.
As far as where to start quilting, you should determine what you are most comfortable with, as there is no “right” answer. Some people prefer to start in the middle, others at the edges. However, for large quilts, it is common to start in the middle. Many quilters prefer rolling up the excess fabric and tying it or clipping it to keep it from unrolling, and then holding the bulk to the left of the machine.
Preventing Stitches From Coming Loose and Stabilizing The Quilt
When beginning each new row of stitches, it is essential to either back-stitch or lock-stitch to prevent stitches from coming loose. There are other more complicated methods for achieving the same thing with a less intrusive look on the back, but the back-stitch and lock-stitch methods work consistently well for beginners. There are helpful videos online that explain these techniques for beginners, including this one below.
Then, proceed with the stitching method you have chosen. For beginners, I would again recommend using the stitch-in-the-ditch method. Make sure your machine is set up correctly (feed dogs up and stitch length set to 2.0–3.0).
Begin stitching carefully. The first few lines will stabilize the quilt and help to prevent it from moving as you work.
Begin stitching carefully. The first few lines will stabilize the quilt and help to prevent it from moving as you work. A good way to do this is to move across the entire length or width of the quilt if you have blocks that allow for that. Many quilters feel that it is best to sew length-wise first and across the width second. The goal is to sew across a large section of your quilt to keep it from shifting later.
Continue working from your starting point outwards until the entire quilt has been stitched.
I like to sew all the lines in a single direction and then turn the quilt 90 degrees to continue sewing in a new direction. Double check that you have not missed anything. Once you have finished this step, you are almost finished!
How To Bind A Quilt
Simply put, the binding is just the strips of fabric that attaches the quilt top to the quilt back and finishes the quilt.
Choosing The Binding Material And Calculating How Much You Will Need
Choose fabric that will hold up well so you can use it for years to come. I generally choose cotton for my quilt top and do the same for the binding. For most quilts (unless they are tiny like a crib quilt) you can use 4 1/2-inch strips of binding.
To calculate the amount of binding you’ll need, add the length of each side to find the perimeter, then add four to five inches for each side. So, for example, if you had a quilt that was 60 inches by 80 inches, you would have a total of 300 inches (60+60+80+80+20) assuming you added five inches per side.
Sewing The Binding Strips
After cutting your strips, sew them into one long, continuous strip per side. When attaching one strip to another, it is best to sew at a 45-degree angle. To do this, place the strips at a 90-degree angle, forming an “L.” Then sew diagonally across the corner. Then, use your rotary cutter to trim the seam allowance to 1/4 inch. Once you have your strips sewn together, press the seams and iron the entire length.
Next, trim excess batting.
Use your ruler or square ruler to square up your quilt. Then begin laying out your binding on the quilt top, playing around with it to get the strips placed just right. There are varying opinions on whether or not to pin at this stage. My advice is to do what you are comfortable with. Line up the edges of your binding strips with the edges of your quilt and begin sewing using a 1/4-inch seam allowance.
Pro Tips
Do not begin at the corner. Always start several inches away from the corner. The reason for this will become apparent as you near your corners.
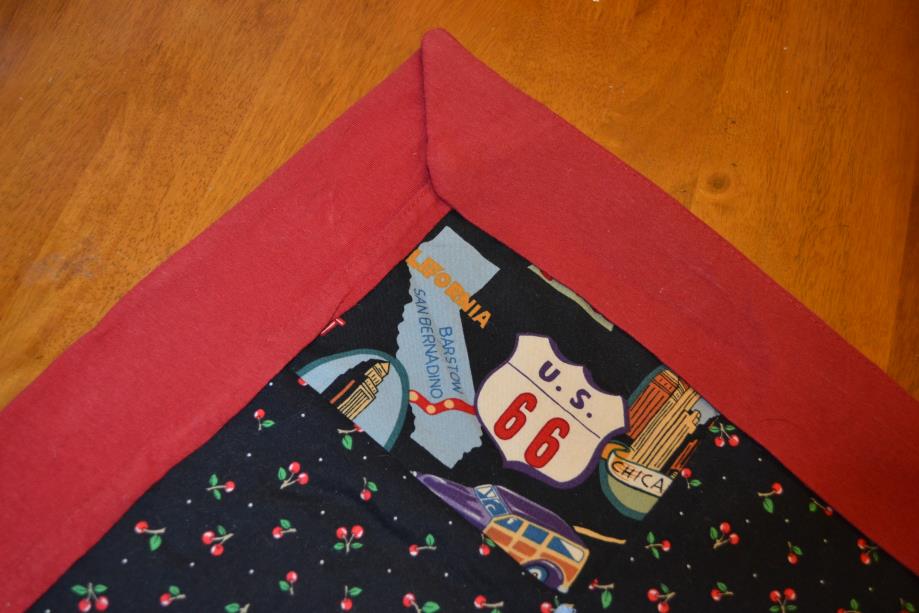
Use a walking foot for this step. When you reach the corner, sew right off the edge. Then, pull the quilt out from the machine, turn as necessary and fold the binding over to create a mitered corner. You will need to tuck a small amount of fabric underneath the fold.
Begin stitching your way down the next side of the quilt until you reach the corner, mitering each corner as you go.
When you reach the end of a binding strip, stop sewing while you have approximately 6 inches of tail left. Then, trim most of the excess leaving a couple of inches. Overlay the next strip, tucking the trimmed tail of the last strip underneath, and begin sewing again. When you reach your starting point, use this overlay method to close the loop on your continuous stretch of binding that has now fully outlined your quilt top.
Finish The Back Of The Quilt
Now you are ready to fold your binding over and finish the back of the quilt.
Fold the binding over and then fold again to create a hem. Pin in place and continue working around the perimeter of the back, mitering the corners by folding. Once you have finished pinning, stitch-in-the-ditch to attach your binding to the quilt back.
You have a finished beginner’s quilt! Congratulations!
Washing A Quilt And Proper Storage
Quilt Washing
Since we have pre-washed our fabrics, many concerns with washing our quilt for the first time are eliminated. But, we still want to be gentle on our new creations and encourage them to last and last.
There are many varying opinions on how to wash a quilt, ranging from hand-washing in distilled water to just tossing it in with the rest of the wash. However, a cautious, but realistic happy-medium approach is what I like to use.
- Start with choosing a dye-free, unscented liquid detergent.
- Skip any fabric softener or bleach as these can damage your fabrics.
- Use a warm water setting on your machine and use the recommended amount of detergent listed on the packaging.
- If you are able, choose extra rinse time on your machine to ensure that no detergent residue is on your quilt. Most cotton quilts will hold up fine in the dryer on a regular tumble dry setting.
- Do not launder your quilt more than is necessary.
- Alternatives to washing are airing out (hanging outside for just a few hours) or tumble dry for 20 minutes or so to freshen quilts up. We want to be gentle on our new creations and encourage them to last.
Quilt Storage
As for storing quilts, the best is on an unused bed. If you want to fold them up for storage, do not place them in plastic. Natural fabrics need to breathe. If you want to put them in something, you can use a pillowcase.
The best place for your new creation is out where everyone can enjoy it!
Tissue paper can be placed between the folds if you like to help prevent permanent creases. Never place quilts any place that may become damp (like a basement). Quilts are made to be used, so only store them away if you really must. The best place for your new creation is out where everyone can enjoy it!
Beyond Quilting 101 – Practicing The Quilting Basics
Once you have mastered the basics of beginner quilting, it’s fun to get practice by making quick and rewarding projects. Here is a list of ideas that any new quilter can make in a short amount of time.
Beginner Quilting Ideas:
- Mug Rugs
- Candle Mats
- Pillow Covers
- Bandana Picnic Blanket
- Quilted Table Runner
- Crib Quilt To Match Blankets
- Christmas Tree Skirt
- Quilted Christmas Stockings
- Quilted Christmas Ornaments
- Wall Hanging
- Pot Holders
- Placemats
- Quilted Back Seat Savers
- Quilted Nap Mats
- Quilt As You Go Quilts (to use excess fabric)
- Throw Blankets
- Memory Photo Quilt
All these ideas and more can be completed quickly and with just basic quilting skills.
We hope you enjoyed this beginner’s guide to quilting! The best way to learn how to make a quilt is to dive right in and learn while cutting/stitching/basting. You’ll be making new creations in no time.