By Lisa Barthuly
This is one of the easiest projects you’ll probably ever do! Understanding the simplistic design and knowing how to build your own rocket wood stove is a very handy bit of information to have and a skill that is essential.
Choose Materials for Your Homemade Rocket Stove
Look around Pinterest for a TON of design options from tin cans to bricks (like we’re going to for our project) to stones or even old stove pipe. It really doesn’t matter what material base you decide to go with; it’s the basic design that matters—you’re building a small combustion chamber and a vertical chimney.
One of the great bonuses with a rocket wood stove is it needs a very small amount of fuel to make it operable. Being able to boil water can be a lifesaver—whether it’s for sanitation needs or coffee. 🙂 If you have home canned soups, stews, etc., you can have a hot meal in minutes!
I decided to fashion my rocket stove out of bricks we had literally just laying around at our homestead. It may not win any beauty contests, but it works. It took only a few minutes to put together; even the children can do it.
There Are Many Reasons to Learn This Skill
We want our children to know how to take care of themselves. This is just a very simple skill, but it’s one more thing they can do if the need or desire arises. It doesn’t have to be a “stuff hit the fan” situation. It can be having a camp out and wanting to cook a jar of Mama’s home-canned stew and have hot cocoa for breakfast. It’s also super handy on those hot summer nights when cooking indoors is the last thing you want to do. A rocket stove is just one more off-grid or grid-down way to cook and boil water.
How to Make Your Rocket Wood Stove
So, let’s get at it. Gather up twenty bricks; chisel or break one of them into halves if you can. My bricks are old and I had two that were broken into almost halves. They did the job. You could use cinderblocks or firebrick. In this case though, I just used old (very old) bricks—nothing fancy. This stove is not going to generate massive high temps that you’d need firebrick for. Find inexpensive bricks at a garage sale, Craigslist, or your local home improvement store.
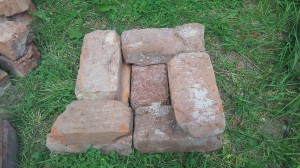
We built our rocket stove on the ground. You could do it on a concrete patio or wherever you have level ground. For the first layer you’ll want your 4 1/2 bricks set up 3 side by side and one full brick across the bottom and the 1/2 brick right next to it. This is your foundation layer. Next layer is going to be 3 1/2 bricks, the 3 bricks going around the foundation layer and the little 1/2 brick (or in my case 3/4 brick—LOL).
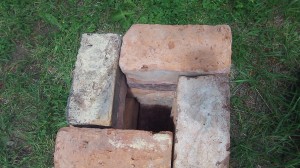
This layer sets the stage for the opening to your combustion chamber into the vertical chimney you’re going to build with the next three layers of four bricks each:
What Fuel to Use
Once you get your stove put together, gather up your fuel. Any dry, small sticks and twigs will do. You don’t want them any longer than about 6 inches, tops. To get your fire going, dry tinder is best: dryer lint, a few dried up leaves, newspaper, even some very dry mossy material lit right up! Then add your tiniest twigs in and get that going, adding your larger pieces as it gets going. Feed your fire through the bottom of your combustion chamber. Don’t overload it—you want the air to draw through it and keep it going nice and hot!
Make Sure There Is Adequate Air Flow
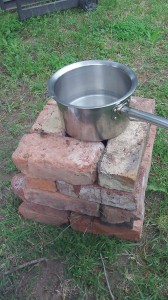
Once you get it rolling, add your pot on top. Do not completely cover the chimney hole. Or what you might do is use two more bricks placed on either side of the chimney hole to prop your pot up above it to keep your air flow moving. My pot was small enough that I had good ventilation going around the pot. You want to keep the fire going good! Keep adding tinder as needed through the bottom of your combustion chamber to keep cooking!
Once you get your meal cooked or your water boiled, let it burn out. The rocket wood stove is for quick cooking, not cranking out meals that require hours and hours of cooking time. When you aren’t using it you can store away your bricks ’til next time.
Love this project! So easy, and so useful!
You can read more from Lisa at her blog.
Want more DIY homesteading tips? Be sure to check out our article on the essentials of knife sharpening!


