


BY CORINA SAHLIN
I want you to know how easy it is to make your own cheese at home. And I’m not talking about soft cheese like Chèvre, but hard cheese—Gouda! When I say hard, I mean the texture, not the difficulty. In this guide, I will teach you step-by-step how to make cheese, and specifically, how to make a beautiful wheel of Gouda cheese. I will hold your hand, explain, and demonstrate every single step of the whey … uh … way. I will show you all of the cheese making supplies you need, including a cheese mold and cheese press, and I will walk you through the ingredients, including cheese cultures and different kinds of rennet.
Helpful Cheese Making Books
Before we get started, here are some super helpful cheese making books. This is not a comprehensive list, but these are my favorite books. I have learned from and turned to over the years:
- Goats Produce Too: The Udder Real Thing by Mary Jane
- Home Cheese Making: Recipes for 75 Homemade Cheeses by Ricki Carroll
- The Cheesemaker’s Manual by Margaret Peters-Morris
- American Farmstead Cheese by Paul Kindstedt
- 200 Easy Homemade Cheese Recipes by Debra Amrein-Boyes
A Step-By-Step Guide On How To Make Gouda Cheese
How do you make cheese? One misconception about making cheese at home is that you need your own dairy animals to get raw milk. That is not true! Most of my students buy pasteurized cow milk at the store and make wonderful cheese with it.
You will learn exactly what ingredients and equipment you need. And please know: you don’t need fancy, expensive stuff to make cheese. In fact, you probably already have a lot of the equipment you require in your own kitchen.
My Introduction to Making Cheese
 I grew up in southern Germany close to the Alps—prime dairy country with lush pastures and meadows full of fragrant herbs. The cows grazing there produce rich, sweet milk that is made into cheese and yogurt in small family dairies. We always bought our cheese directly from these small farms— Appenzeller, Jarlsberg, Bergkäse, Limburger, Tillsitter. Just writing the names of these cheeses makes my mouth water!
Huts In Prime Dairy Country
The area where I grew up is famous for its natural beauty and hiking trails. My parents, three sisters, and I spent many weekends and vacations hiking. Some of my favorite memories are of Alp huts high in the mountains—little houses built with stones and wood, where seasonal cow and goat herders took their animals to graze in the summer.
The inhabitants of these huts spent the summer months milking their animals and making cheese from milk dripping with cream. The huts were connected by a network of hiking trails, and many of them sold beer, lemonade, and Bratwurst to hikers.
I remember sitting on hand-hewn log benches with my back leaning against the sun-warmed stone walls of the huts, listening to the peaceful chorus of cowbells. Beside me gurgled wooden water troughs for the cows and goats. The huge cows with their sharp horns intimidated me, but I loved the goats.
My Introduction To Milk Goats
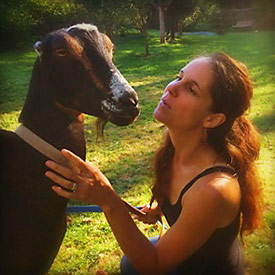 They were as mischievous as we kids: they climbed on stacks of firewood, jumped in the air acrobatically, butted heads with each other, and often approached me to nibble on my hand-knit cardigans and be petted.
I fell in love with goats then. Deep in my bones, I knew I would keep my own herd some day.
I fell in love with goats then. Deep in my bones, I knew I would keep my own herd some day. Two decades later, this dream came true on a different continent. I moved to America when I was 19 years old. Now, in a region of Washington state dubbed as the “Entrance to the American Alps,” my husband and I homestead on five acres. We grow a huge organic vegetable garden and raise goats, pigs, chickens, ducks, and three (human) kids.
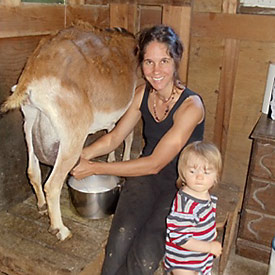
I Started Making Goat Cheese
My childhood love of goats and good cheese were the perfect recipe for becoming an artisan cheesemaker. Milking three goats for a decade, with each goat producing over a gallon of milk a day, I was drowning in milk. Even after feeding a hungry family of five all the milk we could drink and making easy, soft cheese like Chèvre and yogurt, milk started stacking up in our fridge. So, I experimented with making hard cheeses in my kitchen.
Gaining Experience In How To Make Goat Cheese
I settled into a routine of making ten gallons of milk into homemade goat cheese every four or five days. I experimented with different kinds of cheese but ended up sticking with Gouda, Cheddar, Manchego, Caerphilly, Tomme, and Cabra Al Vino (a delicious cheese soaked in red wine), and Feta cheese.
At first, the cheese was over-pressed and too dry. There were wrongly calibrated thermometers, culture or rennet that was not fresh enough, issues with cheesecloth versus pressing molds, and storage problems. I learned a lot from my mistakes, and over the months, I gained experience and skills.
Anyone With A Kitchen And Basic Cheese Making Equipment Can Do It
During a decade of making cheese, I feel like I’ve perfected the art of it. Of course, learning never stops, but I can honestly say that I now make a mean wheel of cheese. You don’t have to be a hardcore homesteader like me to make your own cheese. If you have access to a kitchen and store-bought milk, you are golden.
The following chapters will layout the equipment and ingredients you’ll need. Then I’ll take you through the step-by-step instructions for making, aging, and storing cheese.
Cheese Making Supplies
You don’t need fancy equipment to make cheese, but there are a few essential cheese making supplies that you will need.
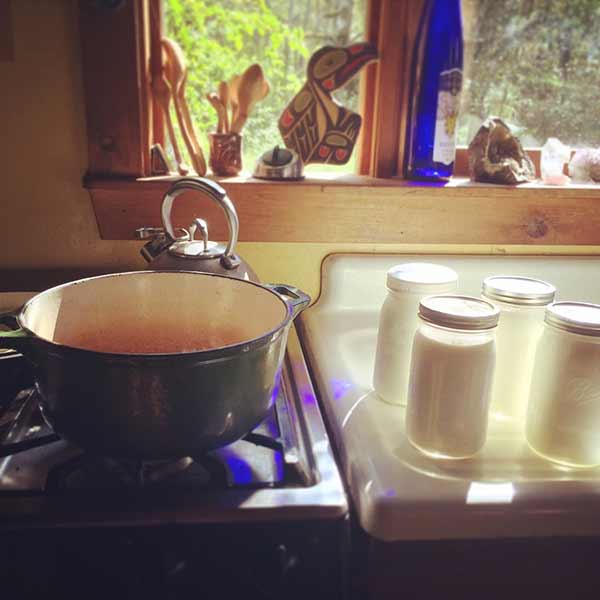
Stainless Steel Pot
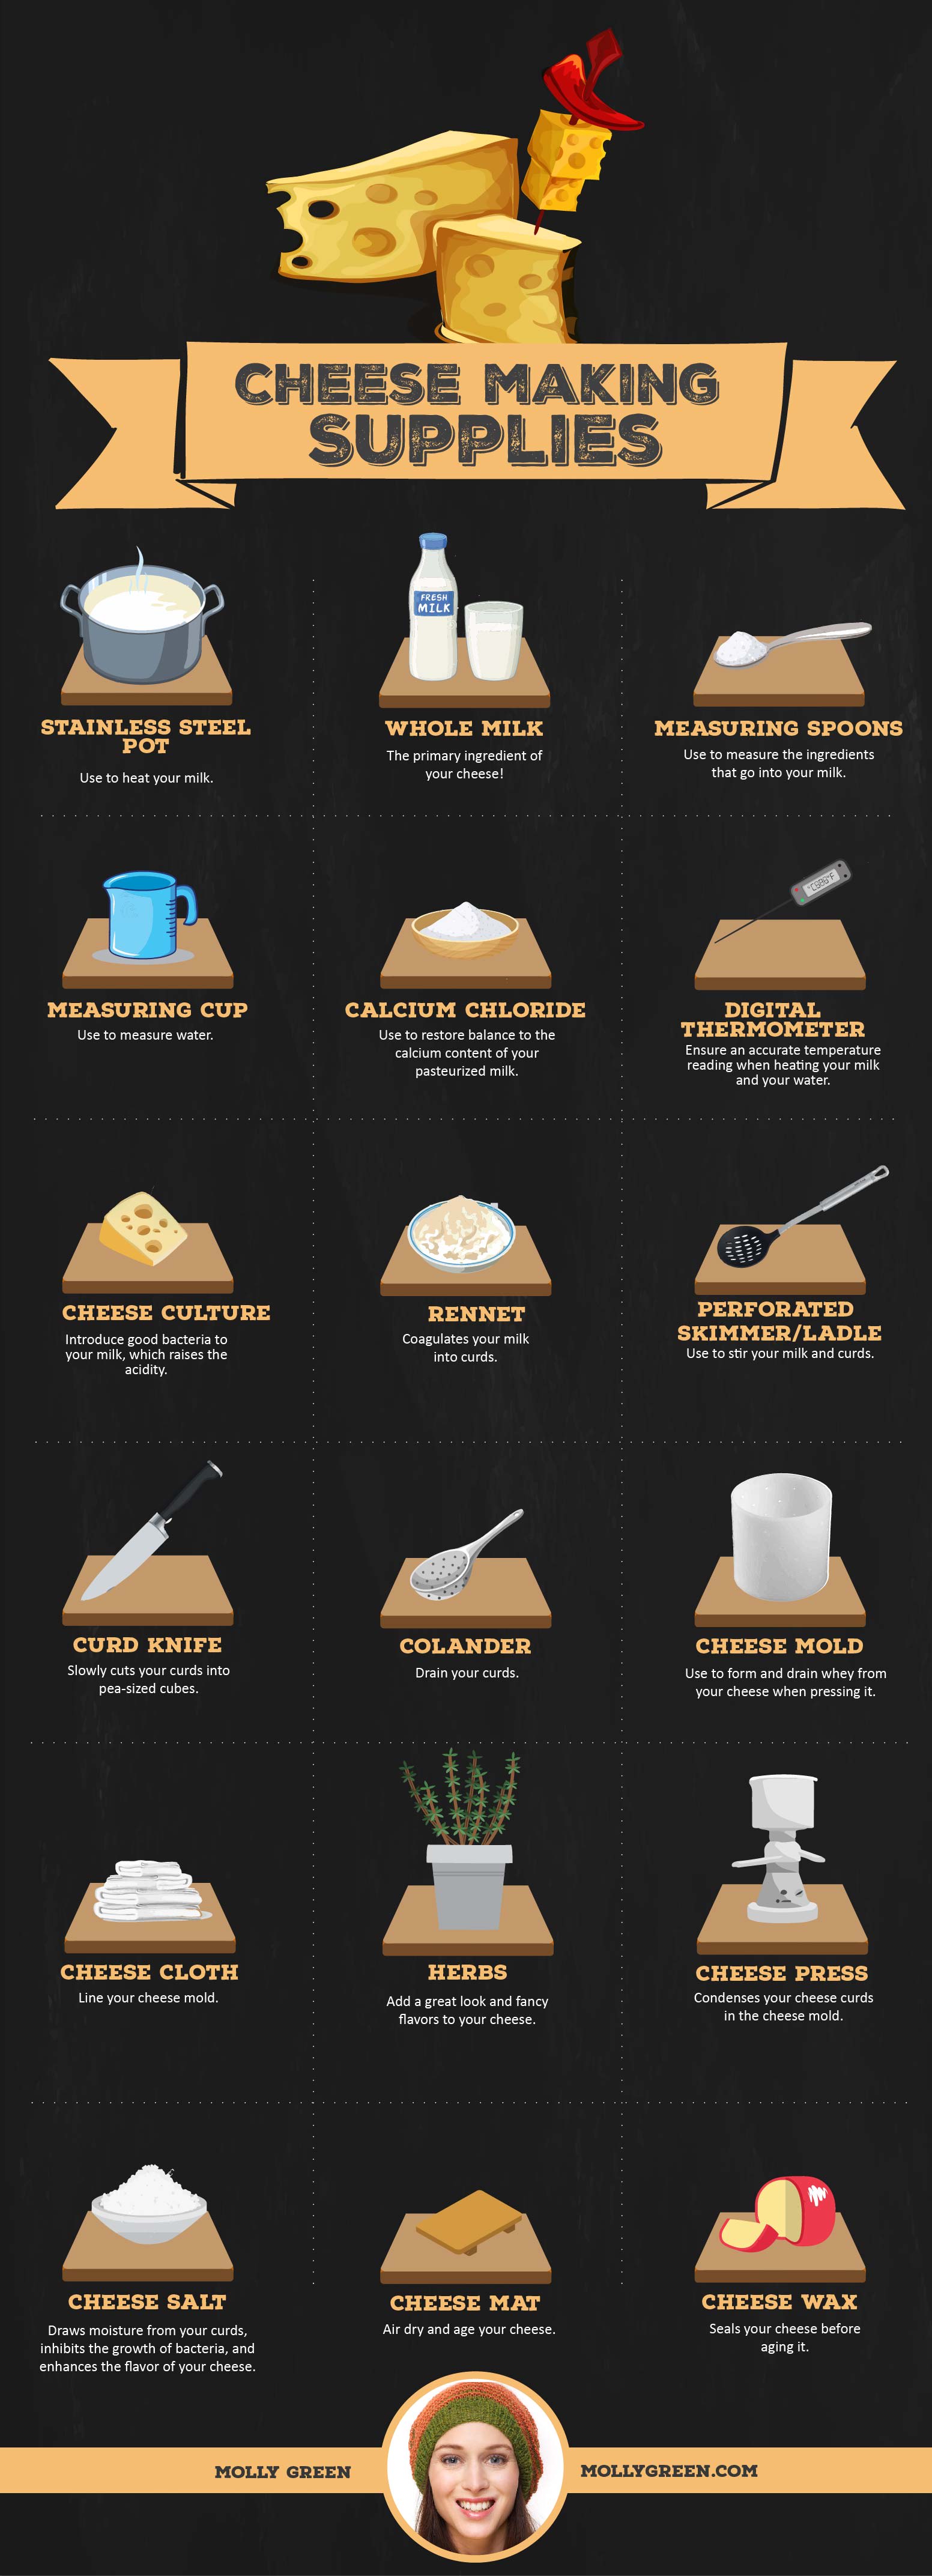
Use a stainless steel pot to heat your milk. Stainless steel is easy to wash and sterilize and doesn’t react to the acidity of the milk. Don’t use aluminum (it reacts to acidity) or enamel (it can chip and crack).
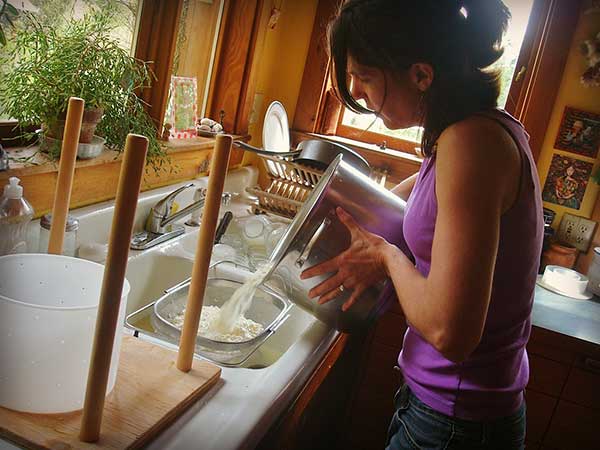
The size of the pot you need will vary depending on how much cheese you want to make. One gallon of milk makes one pound of cheese. Use at least two gallons of milk to make your cheese; anything less will yield a wheel that’s too small. For my cheesemaking classes, I use four gallons of milk and a five-gallon pot (to leave enough room for adding water later). This is a nice size to demonstrate with, and it’s big enough for everyone to get their hands in the whey.
When I’m making cheese by myself, I use a ten-gallon stainless steel pot that I purchased online at a beer making store. My husband made me a custom knife that’s long enough to reach the bottom of this pot; it looks like a sword!
Thermometer
Ah, the thermometer! I’ve tried a lot of them and learned a lesson the hard way. One year, all my cheese turned out too dry, but I didn’t know this until much later when it had aged long enough to be sampled.
I then realized I must have unknowingly heated the milk to too high a temperature because of a faulty thermometer. It was a clip-on thermometer, and when I cleaned it, the screw that calibrates it had become twisted, distorting the temperature reading.
From then on, I have always used a digital thermometer together with a second one to ensure an accurate temperature reading. You can buy clip-on thermometers or digital ones.
Stainless Steel Utensils
You will need a:
- Perforated ladle to stir milk and curds
- Cheese making knife long enough to reach to the bottom of your cheesemaking pot
- Measuring spoons to measure culture and rennet
- Measuring cup for water (plastic is okay because only water will touch it)
- Colander in which to drain the curds
- Container into which to pour the whey
Cheese Mat
These are made from plastic or bamboo and are used for air drying and aging cheese. Really thrifty folks go to a craft store like Michael’s and get needlepoint mats. Just make sure what you are using is food grade.
Optional: Cheese Wax
I usually vacuum seal my cheese before I put it in my cheese cave, but many people use cheese wax. There are advantages and disadvantages to both, and I will talk about that later.
Cheese Mold
 I’m not talking about mold you find on old bread or in the corner of the shower. I’m talking about the mold you use for pressing cheese. Usually, it’s a food-grade plastic container with holes in it for draining out whey. You can also find stainless steel molds.
They come in different sizes. Use a small, two-gallon mold for cheese you make with two gallons of milk, or a five-pound mold to fit a larger amount of curds. New England Cheese Making Supply sells a lot of cheese molds.
Making A DIY Cheese Mold
If you don’t want to spend money on cheese molds, you can make your own. I don’t want to teach you how to make molds in this book, but you can research it on the Internet.
A few tips:
- Making your own molds is tricky because you need draining holes at proper intervals for correct draining of the whey at the correct time, and you need to find the right ratio between diameter to height.
- It’s important to only use food-grade materials that are non-corrosive and easy to sanitize, so definitely don’t use PVC. Since you are dealing with acidity, chemicals can leach into the cheese if you use non-food-grade materials.
- Remember that the curds will shrink considerably during pressing, so choose a shape that will yield a nice sturdy wheel of cheese. If you use a container that is too large, you’ll end up with cheese that is too flat, and it won’t age well that way.
- Another thing to keep in mind: The container you use has to withstand high pressure during pressing time. Use something very, very sturdy.
My recommendation: If you can afford it, buy a mold. It’s not terribly expensive, and it’s a good investment in your home cheese making equipment that will serve you a long time. I have used my Tomme mold extensively for a decade, and they are still great!
Cheesecloth
You will need to line the cheese mold with cheesecloth before you place the cheese curds into the mold. The cheesecloth wicks residual whey out of the cheese while it is being pressed.
Cheese Press (And Making A DIY Cheese Press)
When you make hard cheese like Gouda, you need a cheese press to press the curds. I have used many cheese presses, and my favorite is the one my husband built me because it accommodates two wheels of cheese on top of each other.
Most people who are just starting to get into cheesemaking are shocked at the high price of cheese presses and are not willing to shell out that much money for cheese making supplies and a hobby they might not stick with. So, I am offering hope: It’s very easy to make a homemade cheese press for a little over $10.
Many of my students have learned how to make a cheese press like the one I describe in the video below—even if they don’t have any woodworking skills! As you’ll see, the cheese press plans are simple. All you need are two boards of plywood (or any other hardwood that’s easy to clean) and four large bolts.
Cheese Ingredients For Making Cheese At Home (Including Cheese Cultures and Rennet)
Milk
Did you know that milk is 85% to 95% water? That explains why a nursing woman gets thirsty the minute her baby latches on, and why lactating animals drink a lot! The rest of milk is made up of proteins, minerals, milk sugar (lactose), milk fat, vitamins, and trace elements.
 You can make cheese with milk of many animals: cow, goat, sheep, water buffalo, yak. If you can milk the animal, and if the fat/protein ratio is right, you can make cheese with it. All the cheese I make is raw goat milk cheese.
Goat milk vs cow milk: Goat milk has smaller butterfat globules than cow milk, so it’s easier to digest. Another one of the goat milk benefits is that it is also more acidic than cow milk, so it ripens faster (more on that later).
Raw milk vs pasteurized milk: I love raw milk and raw milk cheese. It tastes delicious when it’s fresh and has a higher vitamin content that heat-treated milk. Many lactose intolerant people can consume dairy products made with raw milk. In this article, I will show you how to make cheese from raw milk as well as from pasteurized milk. This includes making goat cheese from raw goat milk.
 Raw Cheese Benefits and Flavors: In cheesemaking, raw milk beats pasteurized milk when it comes to flavor. It imbues the cheese with amazing fullness and richness and highlights the subtle flavors of the dairy animal’s diet. This goes for cows milk, as well as if you are making raw goat cheese from raw goats milk.
Real milk contains natural flora that are great for making raw cheese.
In Germany, communities in the south celebrate Viehaufzug by decorating their cows with flowers and huge bells. The villagers then accompany the cows into the mountains where the animals gorge themselves with fresh grass and herbs all summer and fall. Cheesemakers live in mountain huts where they make cheese with this wonderful milk. When real cheese connoisseurs eat this raw cheese, they can tell what the animals ate. Real milk contains natural flora that are great for making raw cheese.
Raw milk safety: When you deal with raw milk, cleanliness is extremely important. I keep my animals in tiptop shape. They are healthy, happy, and clean. I wash their teats with teat wipes before milking, and afterwards, the teats get an iodine dip.
I milk into a scrupulously clean stainless steel pail and immediately strain the milk through a milk filter into clean Mason jars. The filled and closed jars then go straight into the fridge in a pot filled with ice water so the milk cools down quickly.
Handled this way, the milk is perfectly safe to drink. Many people are concerned about the possible risks of drinking raw milk. The truth is that the few Salmonella outbreaks in recent years have actually come from pasteurized milk. While I prefer raw milk, you can absolutely use pasteurized milk. We’ll still be friends—I promise!
Cheese Cultures
What is cheese culture? Milk is a perfect medium for bacteria: good and bad. Cheese cultures, also called starter cultures, inoculate the milk with good bacteria, which quickly multiply while consuming sugars in the milk and converting them to lactic acid. So, essentially, cheese cultures raise the acidity of the milk which helps the rennet to set the cheese and aids in preserving and developing the flavor of the cheese during the aging process.
With goat milk, which is more acidic than cow’s milk, this process takes a shorter time. When milk has reached the proper acidity level, it’s considered “ripened.” There are two types of cheese cultures:
- Mesophilic culture: for low-temperature cheeses that are not heated to more than 102 degrees, like Gouda (and most other cheese)
- Thermophilic culture: for higher-temperature cheeses that can be heated to 130 degrees, like Italian cheeses: Mozzarella, Parmesan
I use DVI cultures (Direct Vat Inoculated) because they are so very easy to deal with. They are freeze-dried, powdered cheese cultures that come in convenient packets, which need to be kept in the freezer. I buy these ready-to-use cultures from New England Cheese Supply Company.
I use DVI cultures (Direct Vat Inoculated) because they are so very easy to deal with.
Prior to refrigeration, people used to make a “mother culture”—and some people still do. I think this is fabulous, but I never make culture because it’s extra work. You have to pasteurize milk first, then culture and re-culture it by saving some from an earlier batch, kind of like sourdough starter that you make once and then keep going.
You can keep doing that for a long time, but it’s finicky. It can only be kept in the fridge for a couple of days before the live bacteria croak; even if you freeze it, it only keeps for a month or so. The whole process is too fussy for my taste and doesn’t yield consistent results, so I stick with the DVI cultures.
Don’t confuse the bacteria of starter with bacteria from the outside environment. Starter culture develops the cheese from the inside out. There are also bacteria that work on the cheese from the outside in. You might have heard of old cheese caves in France that harbor very specific bacteria and molds found only in that particular cave, cranking out some of the most fabulous cheese in the world.
Various bacteria and molds break down the proteins and fats in the cheese, releasing different flavors and aromas into it. I remember my father eating the stinkiest Limburger cheese you can imagine. Now those were some bacteria at work!
Rennet
What is rennet in cheese? In cheesemaking, we use rennet to get the protein part of milk to coagulate into curds, which release liquid (whey) as they are heated, condensing more and more. Most of the butterfat stays in the curd, and that’s one of the reasons cheese tastes so great.
The rennet casein process: Rennet has enzymes (rennin and pepsin) that coagulate the milk protein casein. When this coagulated milk is cut into small pieces, it begins to separate into curds and whey.
I always ask the students in my cheese making classes if there are strict vegans present, so I can warn them about this fact: animal rennet is extracted from the fourth stomach of a calf. Whoever figured out that the lining of this portion of a milk-suckling animal would coagulate milk never ceases to puzzle me.
Maybe nomads long, long ago stored milk in bags made from that lining, and after sloshing around on camels in the heat all day, it turned into a solid form that tasted delicious to them. Who knows?
Kinds of rennet: You can buy rennet in many different forms. There is liquid rennet, rennet tablets, and powdered rennet. I use liquid DVI veal rennet (single strength). Keep rennet in the fridge, and keep it dark; otherwise, it will deteriorate and not work anymore. They say rennet keeps for a year, but I have used rennet that is two years old. Just try it, and if the milk doesn’t coagulate, you know you need to buy new rennet.
Vegetable rennet: You can use vegetable rennet, but I don’t like it. I think it makes the cheese taste bitter. If you are extra industrious, you can make vegetable rennet yourself from the bark of a fig tree, an infusion of Our Lady’s Bedstraw, Stinging Nettle, or a thistle plant flower. I’ve never done it, so if you try, let me know how it works!
Cheese Salt
What is cheese salt? Salt enhances the flavor of the cheese; draws moisture from the curds, causing them to shrink; and inhibits the growth of bacteria. It’s important to use non-iodized, kosher salt (like Diamond Crystal), because iodine kills the all-important bacteria that are involved in the aging process. There are three ways to use salt in cheesemaking: either add it to curds before pressing them, use it in a brine for soaking the cheese, or rub it on the cheese after a rind has formed.
Herbs
Herbs are a fun addition to cheese, and herbed goat cheese is delicious. I have incorporated nettles and caraway into my wheels of Gouda to give them an extra fancy flavor and look, and I can’t keep enough caraway Gouda around to satisfy my husband. It’s best to use fresh herbs.
I have incorporated nettles and caraway into my wheels of Gouda to give them an extra fancy flavor and look…
If you use dried herbs, use far less because the dried stuff is more potent: about one teaspoon of dried herb for every tablespoon of fresh herb. I put the herbs in after the curd is done cooking and I’ve drained all the whey out, just before pressing the cheese.
Calcium Chloride
This is a salt solution that is added to milk that has been pasteurized. Calcium Chloride helps restore balance to the calcium content of heat-treated milk. If you use raw milk, you don’t need it. Use 1/4 tsp in 1/4 cup cold water for 2 gallons of milk.
How to Make Gouda Cheese (And Goat Gouda!)
You’ve assembled your equipment and ingredients, and now it’s time to make Gouda! I know the steps below look intimidating and complicated, but they’re not. Don’t be scared! I will walk you through the process and hold your hand every step of the way.
Gouda Cheese Ingredients
- only if you are using pasteurized milk: 1/4tsp calcium chloride per gallon of milk, diluted in 1 cup cool water
- 2 to 4 gallons of milk
- 1/4tsp MM 100 culture, for 2-4 gallons of milk
- 1/2tsp rennet diluted in 1/2 cup water, for 2-4 gallons of milk
- 2lbs cheese salt per 1 gallon of water
How to Make Cheese: Detailed Step-by-Step Directions
You can use bleach to sterilize everything before you make cheese, but I rarely do. Hot water and soap will do a good job.
If using pasteurized milk, dilute 1/4 teaspoon calcium chloride in 1 cup water per gallon of milk, then start heating the milk.
Step 1: Heat milk to 84 degrees F. You don’t need a double boiler for this cheese, whereas other cheese requires it. Milk proteins tend to scorch easily, but with Gouda you only heat it to 84 degrees F initially, then use hot water. More on that later.
Step 2: When the milk is at 84 degrees F, add MM100 cheese culture. Measure out the desired amount (see ingredients), then sprinkle it into the milk. Leave the dried culture to reconstitute in the milk for one minute, then stir it thoroughly for 30 seconds.
Step 3: Let the milk sit quietly and “ripen” for 15 minutes while you do the dishes, or homeschool your kids, or put laundry away. You might even put your feet up and relax.
Step 4: Add rennet, diluted in 1/2 cup of water, and stir it into the milk very thoroughly for 30 seconds with a perforated ladle. Use an up-and-down motion to make sure it gets mixed into the milk evenly.
Step 5: While the milk coagulates, heat about two gallons of water to 140 degrees F for heating the curds later.
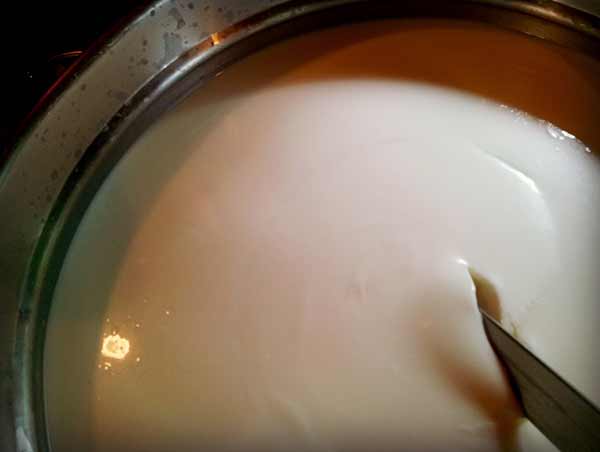
Step 6: Now the magic really starts! The rennet is slowly going to thicken the milk and turn it into curd.
You are looking for a clean break: When you insert a knife, the curd should break cleanly around it…
It’s important to cut the curd at the right time. Too soon, and the curds are too soft, but if you wait too long, the cheese curds are going to be too tough. With my raw goat milk, “the right time” usually happens after 25 to 30 minutes. With pasteurized cow milk, it could take 45 minutes.
You are looking for a clean break: When you insert a knife, the curd should break cleanly around it, and clear whey should fill the gap produced. This is what you are looking for:
Step 7: Now start cutting slowly so the whey is released very gradually from the curd. This process should take ten minutes.
We are aiming for pea-size cubes. Here’s how you do it: Insert your knife 1/4 inch from the side of the pot, then slowly draw the knife through the curd in a straight line. Be sure the knife reaches all the way down to the bottom; otherwise, that part won’t get cut.
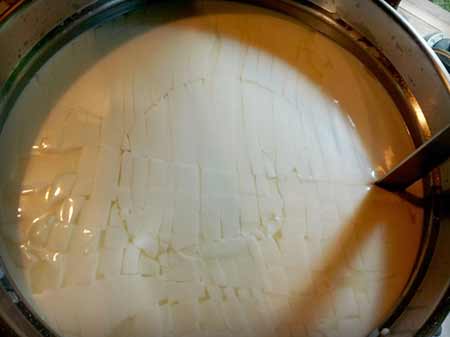 Then just keep cutting lines 1/4 inch apart parallel to the first line until you get to the other side of the pot. Now you have a pot full of 1/4-inch vertical slices.
Next, turn the pot 90 degrees and repeat the process. Now you have a checkerboard pattern of 1/4-inch square (really tall!) cheese curds.
Next, slant your knife at a 45-degree angle and cut the curds in lines 1/4 inch apart from each other. Turn the pot again a quarter of a turn and repeat the cutting. Turn it yet again a quarter of a turn and repeat the cutting.
Step 8: After ten minutes of cutting, drain off about one quarter of the whey. You’ll be pouring off a little bit of the liquid that has formed on top of the curd mass. Then you will start heating up the curds by adding hot water in a couple of steps.
Step 9: Add 140-degree F water to the curds until they reach 90 degrees F. Add the water slowly so you don’t overheat them.
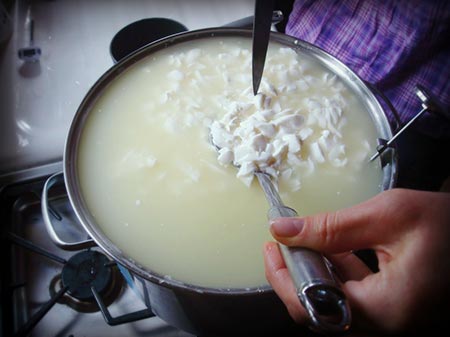
Step 10: Stir the curds very gently the whole time you are adding the water so they don’t stick together. If you use goat milk, be especially gently with the curds because they are very fragile. Cut bigger curds while you stir, since you can’t get them all the same size the first time around.
Stir for 12 minutes. Be gentle—very gentle.
Step 11: Drain off whey until the pot is half as full as it was when you started and you can see the curds that have settled to the bottom of the pot.
Step 13: Stir the curds for 10 minutes.
Step 14: By now, the cheese curds have firmed up quite a bit, and it’s time to drain the rest of the liquid. I put it in a bucket to feed to the pigs or chickens. You can also make bread, boil rice, water your plants, or make a drink with it. If you have a septic system, don’t drain whey down your sink—it will clog it. Don’t ask me how I know this. All I can tell you is that it involved several hundred dollars.
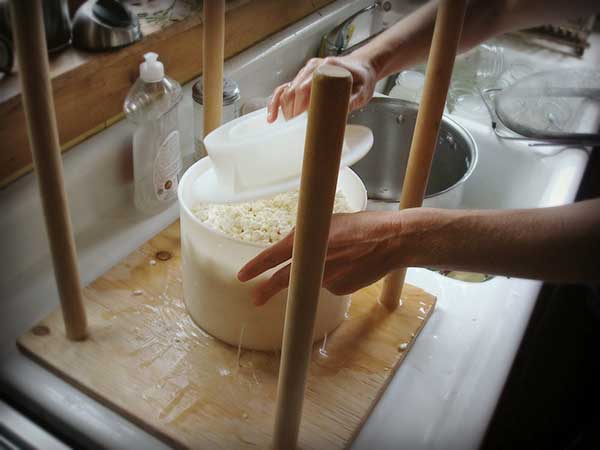
Step 15: Line your cheese mold with cheesecloth, then use your hands to scoop the cheese curds into the cheese mold and spread them around evenly.
Step 16: Press at 15 pounds of pressure for 30 minutes. I use thrift store barbells, but you can also use jars of water. Just weigh them to make sure they are heavy enough.
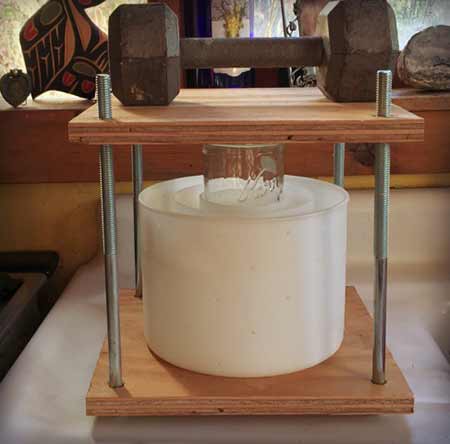
Step 17: Flip the cheese over and press at 15 pounds of pressure for 30 minutes again.
Step 18: After pressing, take the weights off the press, but leave the cheese in the mold until you are ready to put it in the brine later.
Step 19: 12 hours after adding the culture, put the cheese in the brine. I usually make cheese in the morning and then put it in the brine at night, before going to bed.
The brine is made by dissolving two pounds of cheese salt into one gallon of water. Keep the brine refrigerated and reuse it over and over.
Step 20: Leave the cheese in the refrigerated brine overnight.
Step 21: In the morning, take the cheese out and pat it dry with paper towels. Put the cheese on a cheese mat on top of a stainless steel wire rack so the air can circulate around the cheese. Put the wire rack on a cookie sheet to catch the liquid, which will continue to drip.
If mold develops on the cheese, you are not keeping it dry enough, or there is too much humidity.
Your cheese will now dry at room temperature. Turn it regularly until it is dry to the touch. This process can take up to five days. If mold develops on the cheese, you are not keeping it dry enough, or there is too much humidity. Just wipe off the mold—your cheese will be fine.
In chapter 5, I will show you what to do when the cheese is dry.
How To Seal Cheese and How To Age Cheese
You made a beautiful wheel of cheese, and it’s dry. Now what?
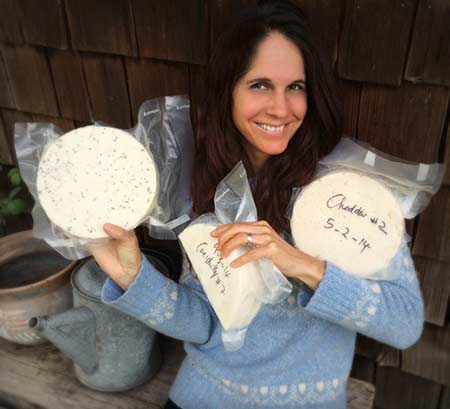
Sealing Cheese
I vacuum seal my cheese. I know, I know. How can cheese breathe when it’s sealed in plastic? All I can say is that I have done it like this for a decade, and it has worked out beautifully.
I have tried using cheese wax, which makes it look pretty, but it doesn’t work very well for me. When the cheese dries and shrinks, the wax can crack and create mold. For some reason, the edges always get thin and mold.
Plus, wax is very hot and hard to handle, and I usually make cheese when my little children are underfoot. The few times I waxed the cheese, I burnt myself and was scared my kids would get splattered.
If you choose to try waxing, one trick is to put your wheel of cheese in the fridge for an hour so the hot wax will really adhere to the cold cheese. Vacuum-sealed cheese might not look as pretty as waxed cheese, but it works well and is convenient and cheap.
Aging Cheese
Few of us have access to a real cheese cave. I do all my cheese aging in our cellar/crawl space. Cheese needs relatively high humidity and a temperature range of 50–55°F to age properly. Humidity should be no less than 75% and no greater than 95%. Although my cellar is not consistent with this, it’s close enough.
If you don’t have a cellar, you can use a little wine cooler or a dorm-size fridge turned up to 55°F with a bowl of water in the bottom for humidity. You can monitor the humidity with a hygrometer if you want, although I never do.
Cheese is a living, breathing thing. It needs to age and mature to develop its flavor and texture. You need to let cheese made from raw milk age at least two months to make it safe in case there are bad bacteria present. Time allows the curd to dehydrate and become acidic enough to make it hard for harmful bacteria to multiply.
Cheese is a living, breathing thing. It needs to age and mature to develop its flavor and texture.
In my opinion, the longer you age cheese the better it gets—I really love strong cheese. Some people prefer younger, milder cheese that has only been aged for two months. I never manage to hold onto my cheese long enough to age it a long time, so my husband once hid a wheel of cheese from me.
On our anniversary, he presented me with a large mysterious present. I ripped it open and found a wheel of my own Gouda cheese that I had made one year before. What a romantic guy, my husband, eh? We cut into the cheese right then and loved the stronger flavor so much that I now restrain myself and hold onto the cheese longer. It’s worth it.
A word of caution if you age your treasured cheese in a cellar: The first year I made cheese, I had accumulated about a dozen beautiful wheels. They happily matured in our dirt-floor crawl space.
When I checked on the cheese one day, I realized with horror that mice had tunneled underneath the stem wall through the dirt floor and taken nibbles from my cheese. They must have thought they’d died and gone to heaven! I was extremely frustrated and begged my husband to fix the situation. He promptly poured concrete onto the floor, and we have never had a problem since. Ha! Take that, mice!
So, there you go! That’s all you need to know to get started making cheese. What are you waiting for?
Abbreviated Gouda Cheese Making Instructions
If using pasteurized milk, dilute 1/4 teaspoon calcium chloride in 1 cup water per gallon of milk, then start heating the milk.
Step 1: In a stainless steel pot, warm milk to 84 degrees F.
Step 2: For 2 to 4 gallons of milk, add 1/4 tsp MM 100 culture. For 4 to 10 gallons of milk, add 1/2 tsp culture.
Step 3: Let sit for 15 minutes to ripen.
Step 4: For 2 to 4 gallons of milk, add 1/2 tsp rennet diluted in 1/2 cup water. For 4 to 10 gallons of milk, add 1 tsp rennet diluted in water. Stir thoroughly for 30 seconds.
Step 5: In a different pot, start heating water to 140 degrees F.
Step 6: Let milk sit and coagulate for 25 minutes, or until you get a clean break when inserting a knife into the milk (see step 6 in the step-by-step instructions above).
Step 7: Slowly cut the curds into small, pea-size cubes for 10 minutes.
Step 8: Drain about 1/4 of the whey.
Step 9: Add 140-degree F water until the curds reach 90 degrees F.
Step 10: Stir the curds for 12 minutes.
Step 11: Drain the whey until it’s one half the volume of the milk you started with.
Step 12: Add 140-degree F water until the curds reach 95 degrees F.
Step 13: Stir the curds for 10 minutes.
Step 14: Drain the curds in a colander.
Step 15: Put curds into a mold.
Step 16: Press at 15 pounds of pressure for 30 minutes.
Step 17: Flip cheese over and press again at 15 pounds of pressure for 30 minutes.
Step 18: Take weight off mold, but leave cheese in mold until you are ready to put it in brine.
Step 19: 12 hours after adding culture, put cheese in brine in fridge (stir 2 pounds of cheese salt into one gallon water).
Step 20: Leave cheese in brine for 12 hours.
Step 21: Take it out of brine and dry on cheese mat at room temperature for several days until cheese is dry.
Step 22: Vacuum pack or cover with cheese wax.
Step 23: Let the cheese age at least two months or longer.
Troubleshooting The Cheese Making Process
Despite your best efforts, sometimes your cheese has problems. It happens. Don’t worry. Even the most experienced cheesemakers run into trouble. Here are some of the most common problems:
Milk does not coagulate!
- Is your rennet too old? Always use fresh rennet. Remember, it has to be kept in the fridge, away from light, and it’s only viable for a year or two.
- Did you use enough rennet? Follow your recipe.
- Did you dilute the rennet with hot water? Only use cold water, since hot water destroys rennet.
- Is your milk too old or over-pasteurized? Use only fresh milk, and don’t use ultra-pasteurized milk.
- Did you use milk with colostrum (that’s what the mom produces for a few days after her babies are born)? Milk containing colostrum will not coagulate.
Milk coagulates too fast!
- Maybe your milk is too acidic, which happens when you use too much starter culture, or if you let the milk sit for too long before adding rennet. Use less starter culture, and if that doesn’t fix the problem, don’t let it ripen so long.
I don’t get a clean break!
- Did the milk coagulate long enough? You might just have to wait longer. When I use raw goat milk, a clean break happens much faster than when I use pasteurized cow’s milk. If you still don’t get a clean break after waiting longer, try to add more diluted rennet, but only one fourth of what you used to begin with.
- Your rennet might be too old. Only use fresh rennet.
My curds are too soft!
- Did you give them enough time to coagulate? They might need more time.
- Did you use ultra-pasteurized or ultra-homogenized milk? Don’t use this kind of milk. You could try adding more rennet, but only if you haven’t cut your mass into curds yet.
My cheese is rubbery!
- Maybe you used too much rennet. Follow your recipe.
- You might have overworked or overcooked the curds, which will make the butterfat escape the cheese and make the texture rubbery. Be gentle with the curds. Don’t stir them too much or too vigorously. Don’t cook them at too high a temperature. Follow the recipe, and make sure to check that your thermometer reading is accurate.
The curds don’t press correctly!
- Did you stir or cook the curds too much? Overworking or overheating makes curds lose too much moisture. They then become too hard to press.
My cheese tastes sour and acidic!
- There might be too much moisture in your cheese. Reduce the moisture content during cheesemaking. Make sure you cut your curds into uniform pieces.
- Maybe you used too much starter culture, which developed too much acidity during the cheesemaking process. Follow your recipe closely.
My cheese tastes bitter!
- Did you let the cheese drain enough during pressing? It’s important for whey to drain out properly for the development of flavor.
- Maybe you didn’t add enough salt to the cheese. Check your brine.
- Maybe things weren’t clean enough when the milk or equipment was handled. Keep your milk cold and sanitary and keep all your cheesemaking equipment very clean.
My cheese tastes bland and boring!
- Maybe you didn’t age it long enough. Cheese improves with age. I know you are excited to try it, but resist the temptation. Wait a least two months, or even a year!
- Was enough whey expelled during heating of the curds? If not, the flavor may be diluted. Cut curds into smaller pieces, or stir them more to release more whey.
- You might have heated the curds too fast. Raise the temperature very slowly.
My cheese is way too dry!
- Did you add enough rennet? Follow your recipe.
- Did you cut your curds too small? If the size of the curds is too small, too much whey is released.
- Did you heat the curds at too high a temperature? High temperatures remove too much moisture.
- Are you pressing your cheese with too much pressure? Too much pressure expels too much whey, which makes the cheese dry.
- Did you overwork the curds? Be gentle and careful with the curds.
There are cracks in my cheese!
- You might not have pressed the cheese enough, or at too little pressure. The curds didn’t mold together enough and now show cracks. Increase amount of pressure or press cheese for longer.
The cheese looks oily while I’m drying it!
- The place where you are drying your cheese is probably too warm, which makes the fat rise to the surface. This happens to me sometimes when I age cheese in my kitchen when the wood stove is cranking. Dry your cheese in a cooler place.
- It can also happen when the curd was stirred too vigorously or heated at too high a temperature. Be gentle when stirring curds, and lower the cooking temperature.
Mold is growing on my cheese!
- Don’t freak out yet. Mold happens. Sometimes, things aren’t as clean as they should be, so try to keep all your equipment and ingredients very clean.
- Maybe the humidity where you are aging the cheese is too high. Wipe off the mold and make sure to keep things clean. Lower the humidity.
Additional Resources For How To Make Cheese At Home
Supplies
Some of my favorite companies to order from are:
- New England Cheese Making Supply Company. Here you will find ingredients, starter cultures, cheese presses and other equipment for making cheese. Their prices are a little higher than what you will spend when following this cheese making tutorial on Molly Green.
- Cultures for Health. Lot’s of products and information about making natural cultured foods. In addition to cheese they have starter kits for kombucha, kefir, yogurt and sourdough.
Websites
See above under “supplies.” All these suppliers have great info on their websites. Also, my website and blog are fun to learn from.
About The Author
I hope you enjoyed this book. If you want some of my free tutorials, to learn more about homesteading, or are curious about our lifestyle and special offerings to the world, please visit us at marblemounthomestead.com.
If you enjoy reading blogs, mine is inspiring, fun, and loaded with great tips for homesteading, homeschooling, and living a healthier, happier, and sustainable life. Come on over and visit me on my blog!
PS: I created a self-paced online cheesemaking course where people learn how to make Greek yogurt, Chèvre, Gouda, and Cabra Al Vino. This workshop includes beautiful, detailed e-books and movies I filmed in my kitchen on making each cheese, filled with gorgeous pictures, step-by-step instructions, and many tips and tricks that I have learned in over a decade of making thousands of pounds of cheese at home. You can start and end the course any time you want and have lifetime access to it.